Introducing FlexFence
Create dynamic fences and railings in seconds with the new FlexFence component!
This is one of the most complex components we've created so far 

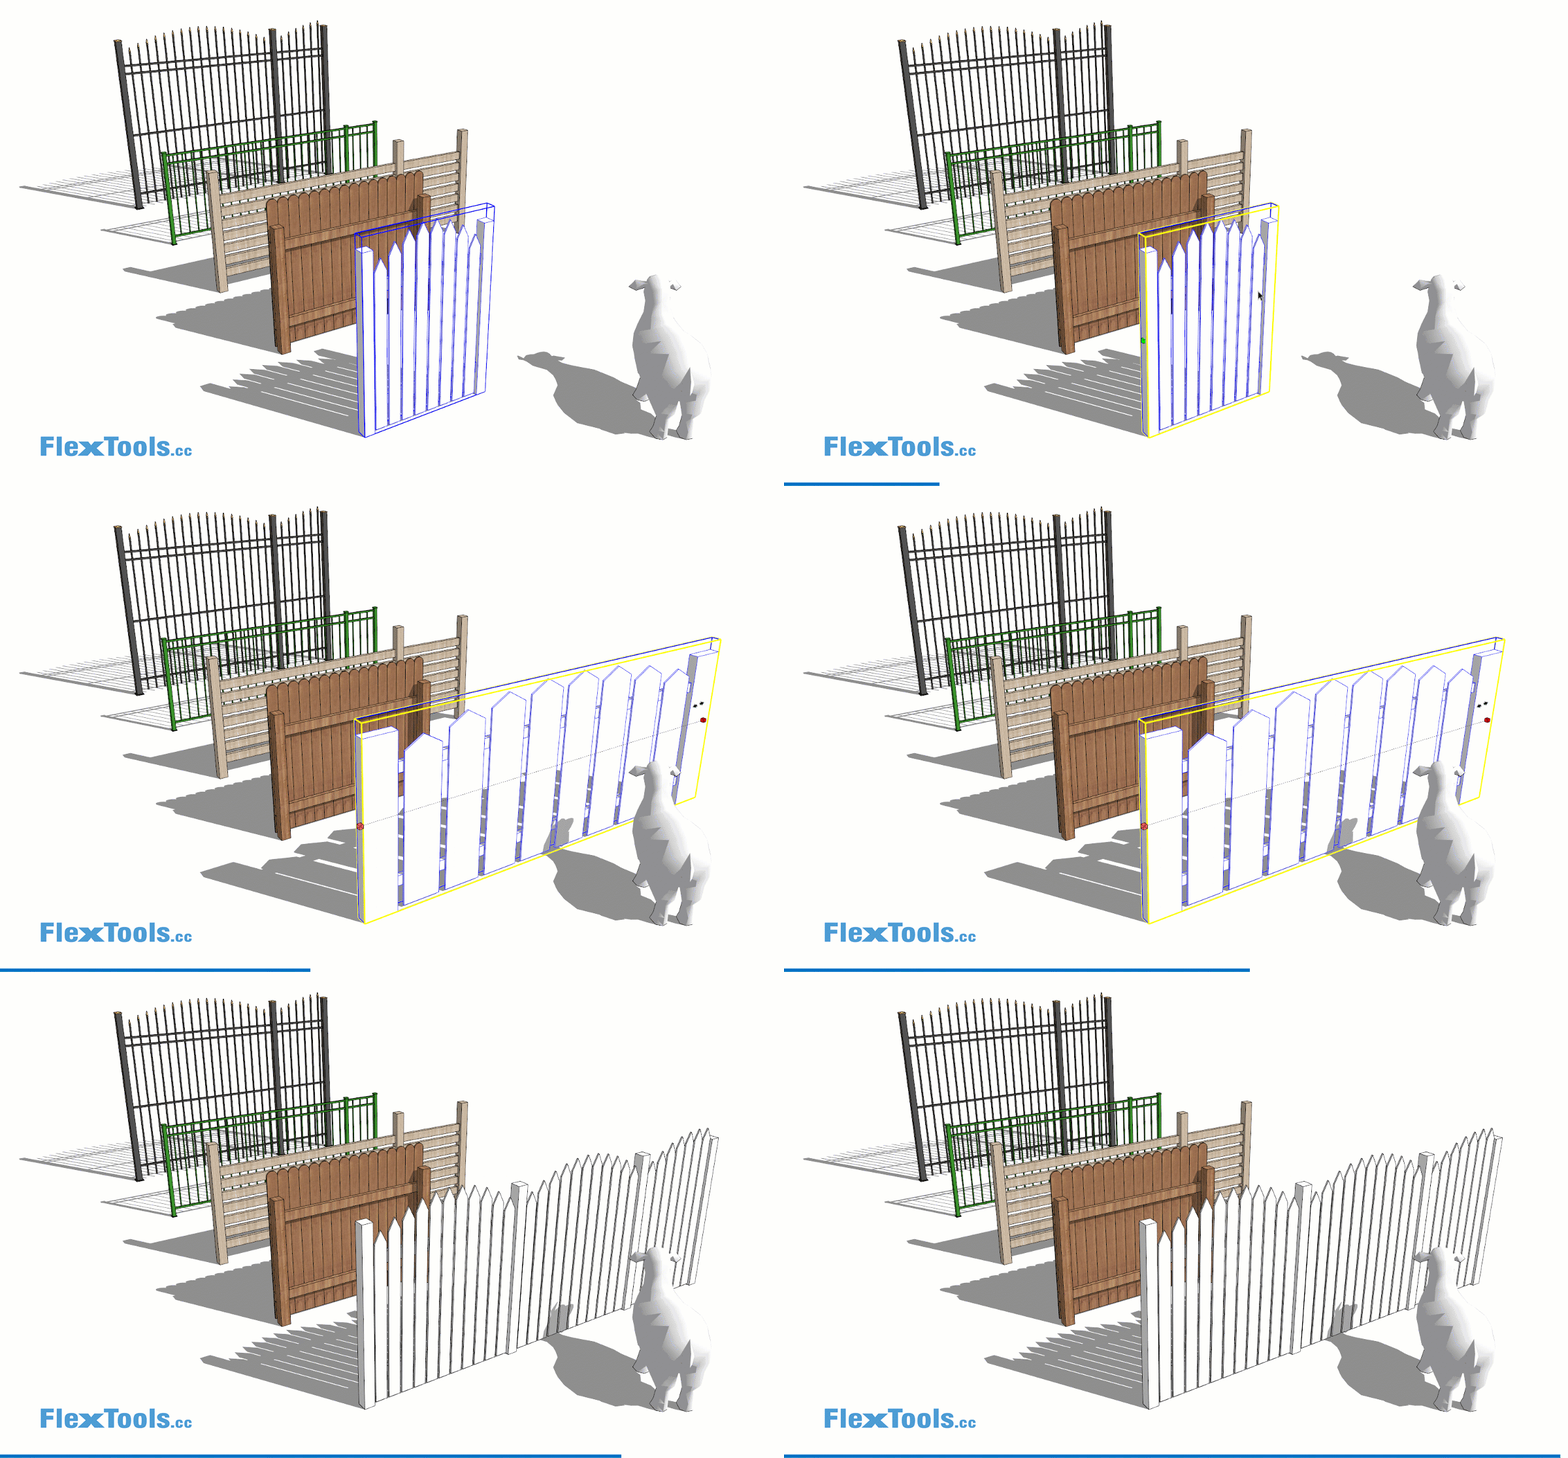
With 4 basic layouts and a bunch of options, with this one component you can create roughly 70% of fences and railings out there, both wooden and metal style. (In future version we plan to cover the rest).
Fence Layouts
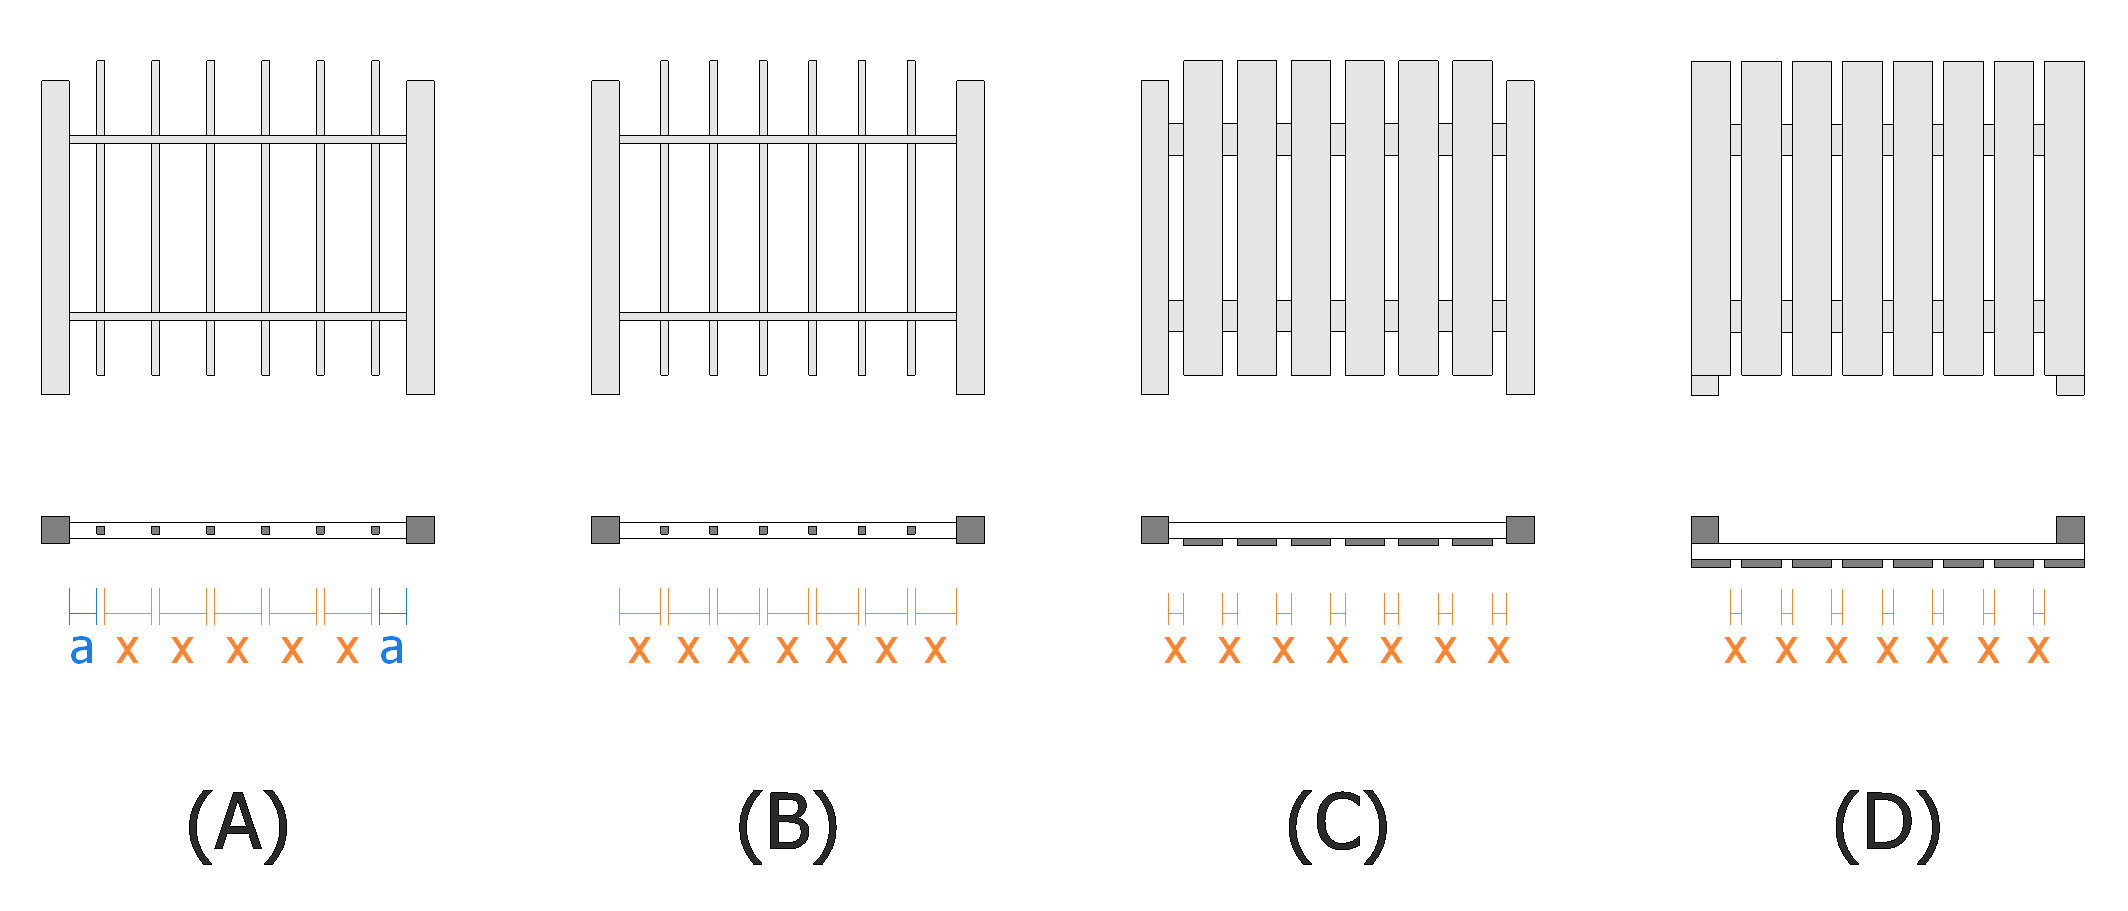
Choose how to arrange your fence elements with 4 available layouts.
The layouts are defined by the relative positions of their posts, pickets, rails & picket distribution.
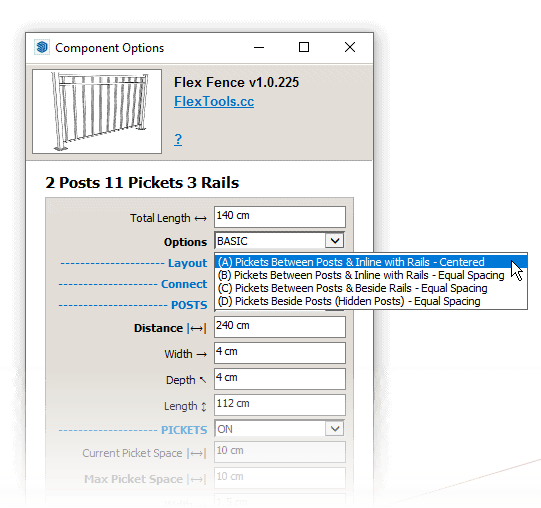
Layouts (A) and (B) are more suitable for iron style fences, while (C) and (D) are more suitable for wooden style fences.
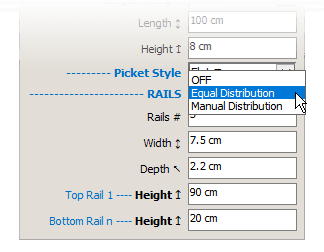
There are 2 options for rail distribution:
- Equal - the rails are placed, equally spaced, between the top and bottom rails.
- Manual - you assign a height for each rail manually (up to 8 rails).
Connecting Fences
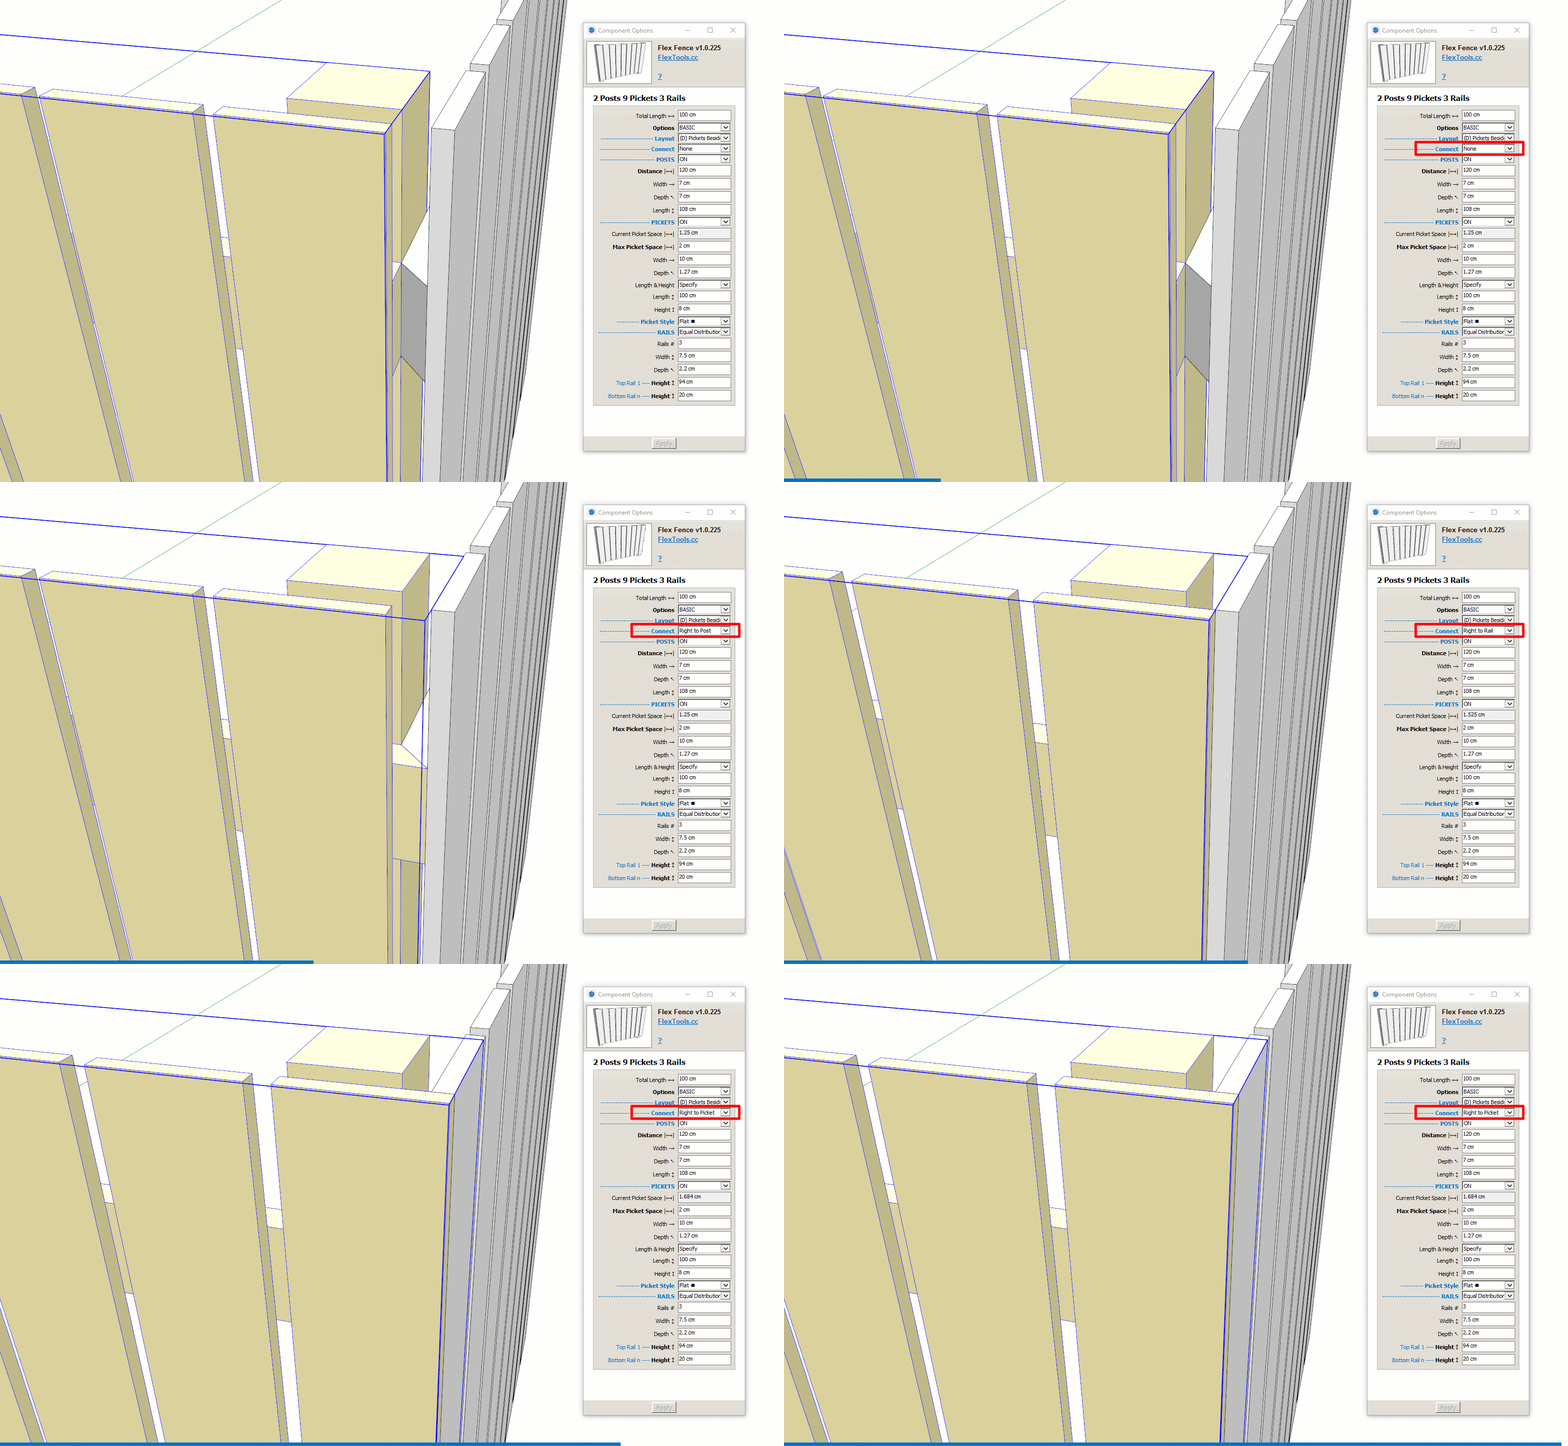
In order to connect two FlexFences to form a corner:
- Place two fences in a 90 degree angle to each other, having them share the location of one of their posts.
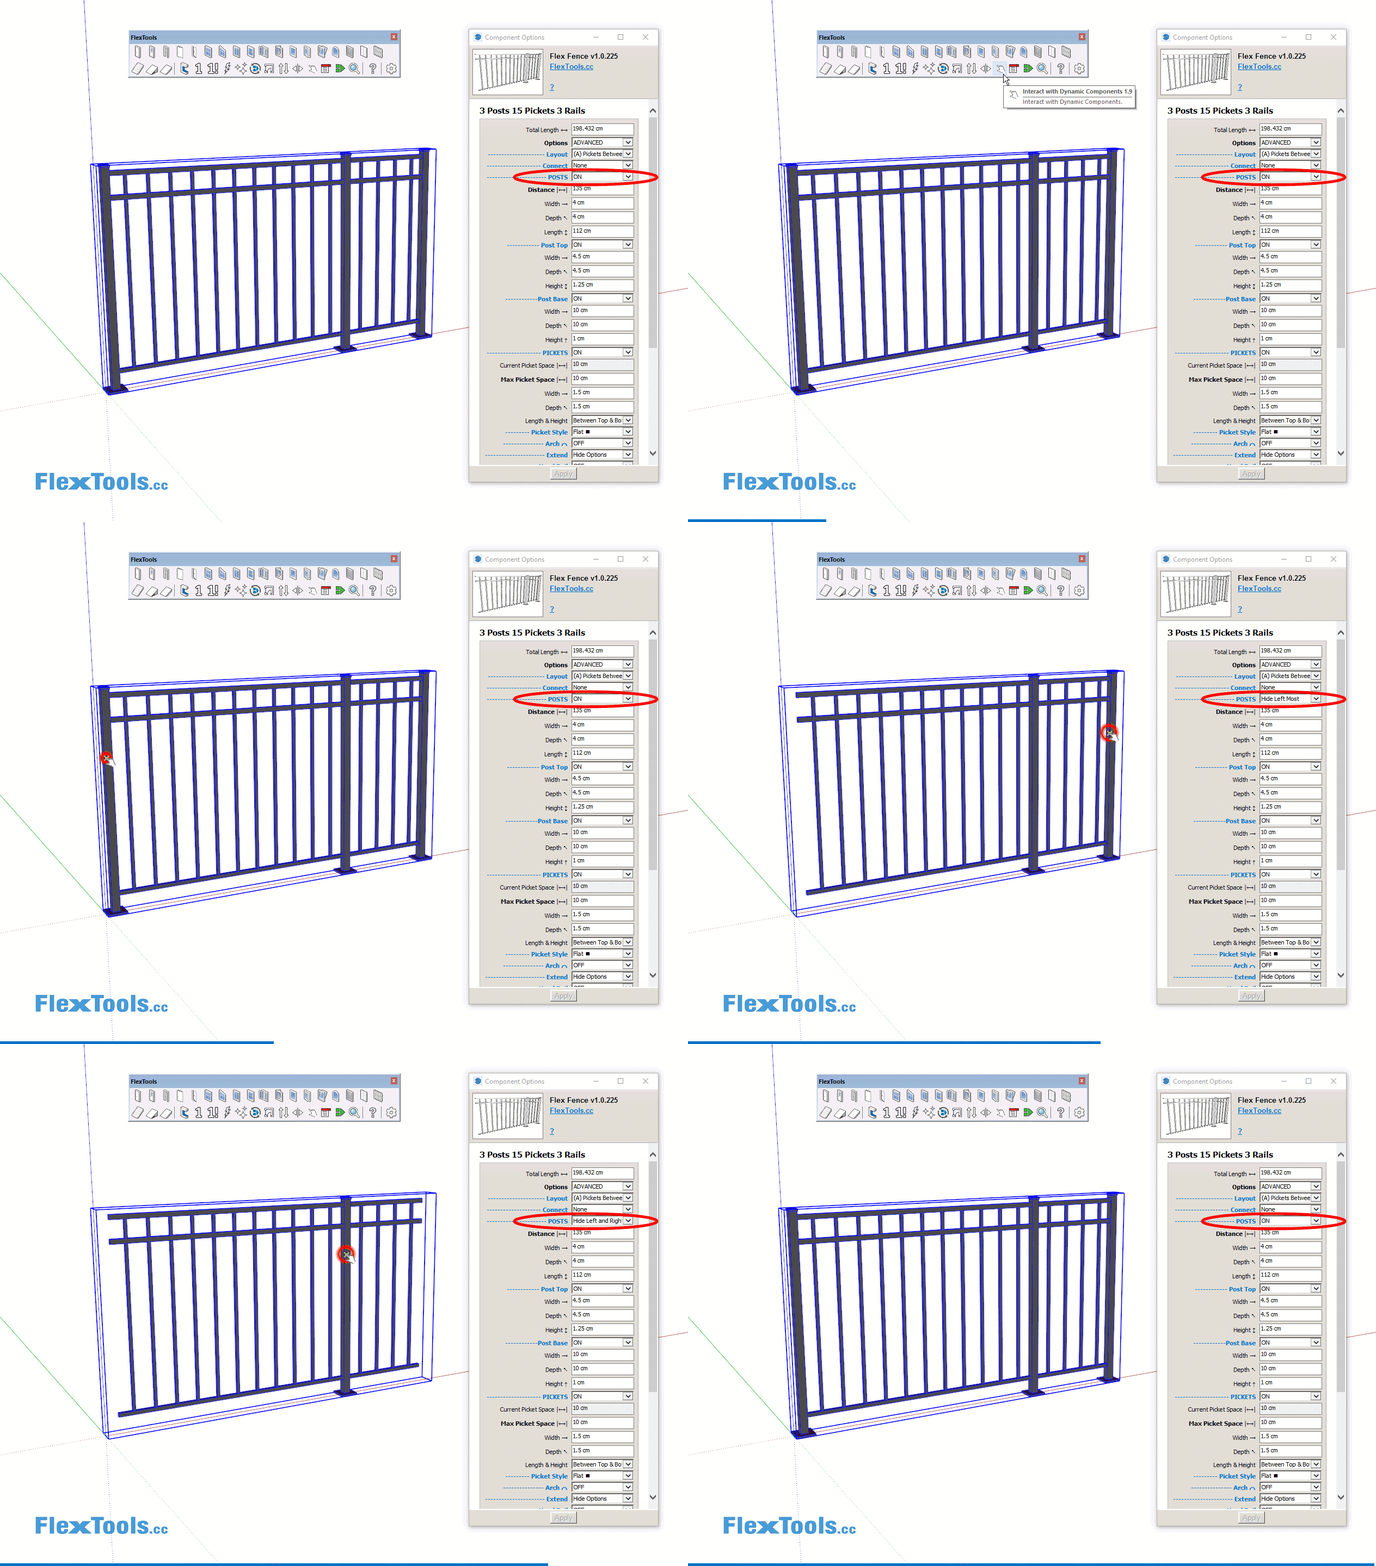
- Hide one of the edge posts by clicking on it with the interact tool or through the options menu.
- If needed, you can choose to extend the picket positions of each fence to reach the other's post, rail or picket (see animation below).
Hiding Edge Posts (Quickly)
With the Interact Tool, click on the first and last posts to hide them. To bring them back click on the middle posts or on any of the rails.
FlexFence and Stairs
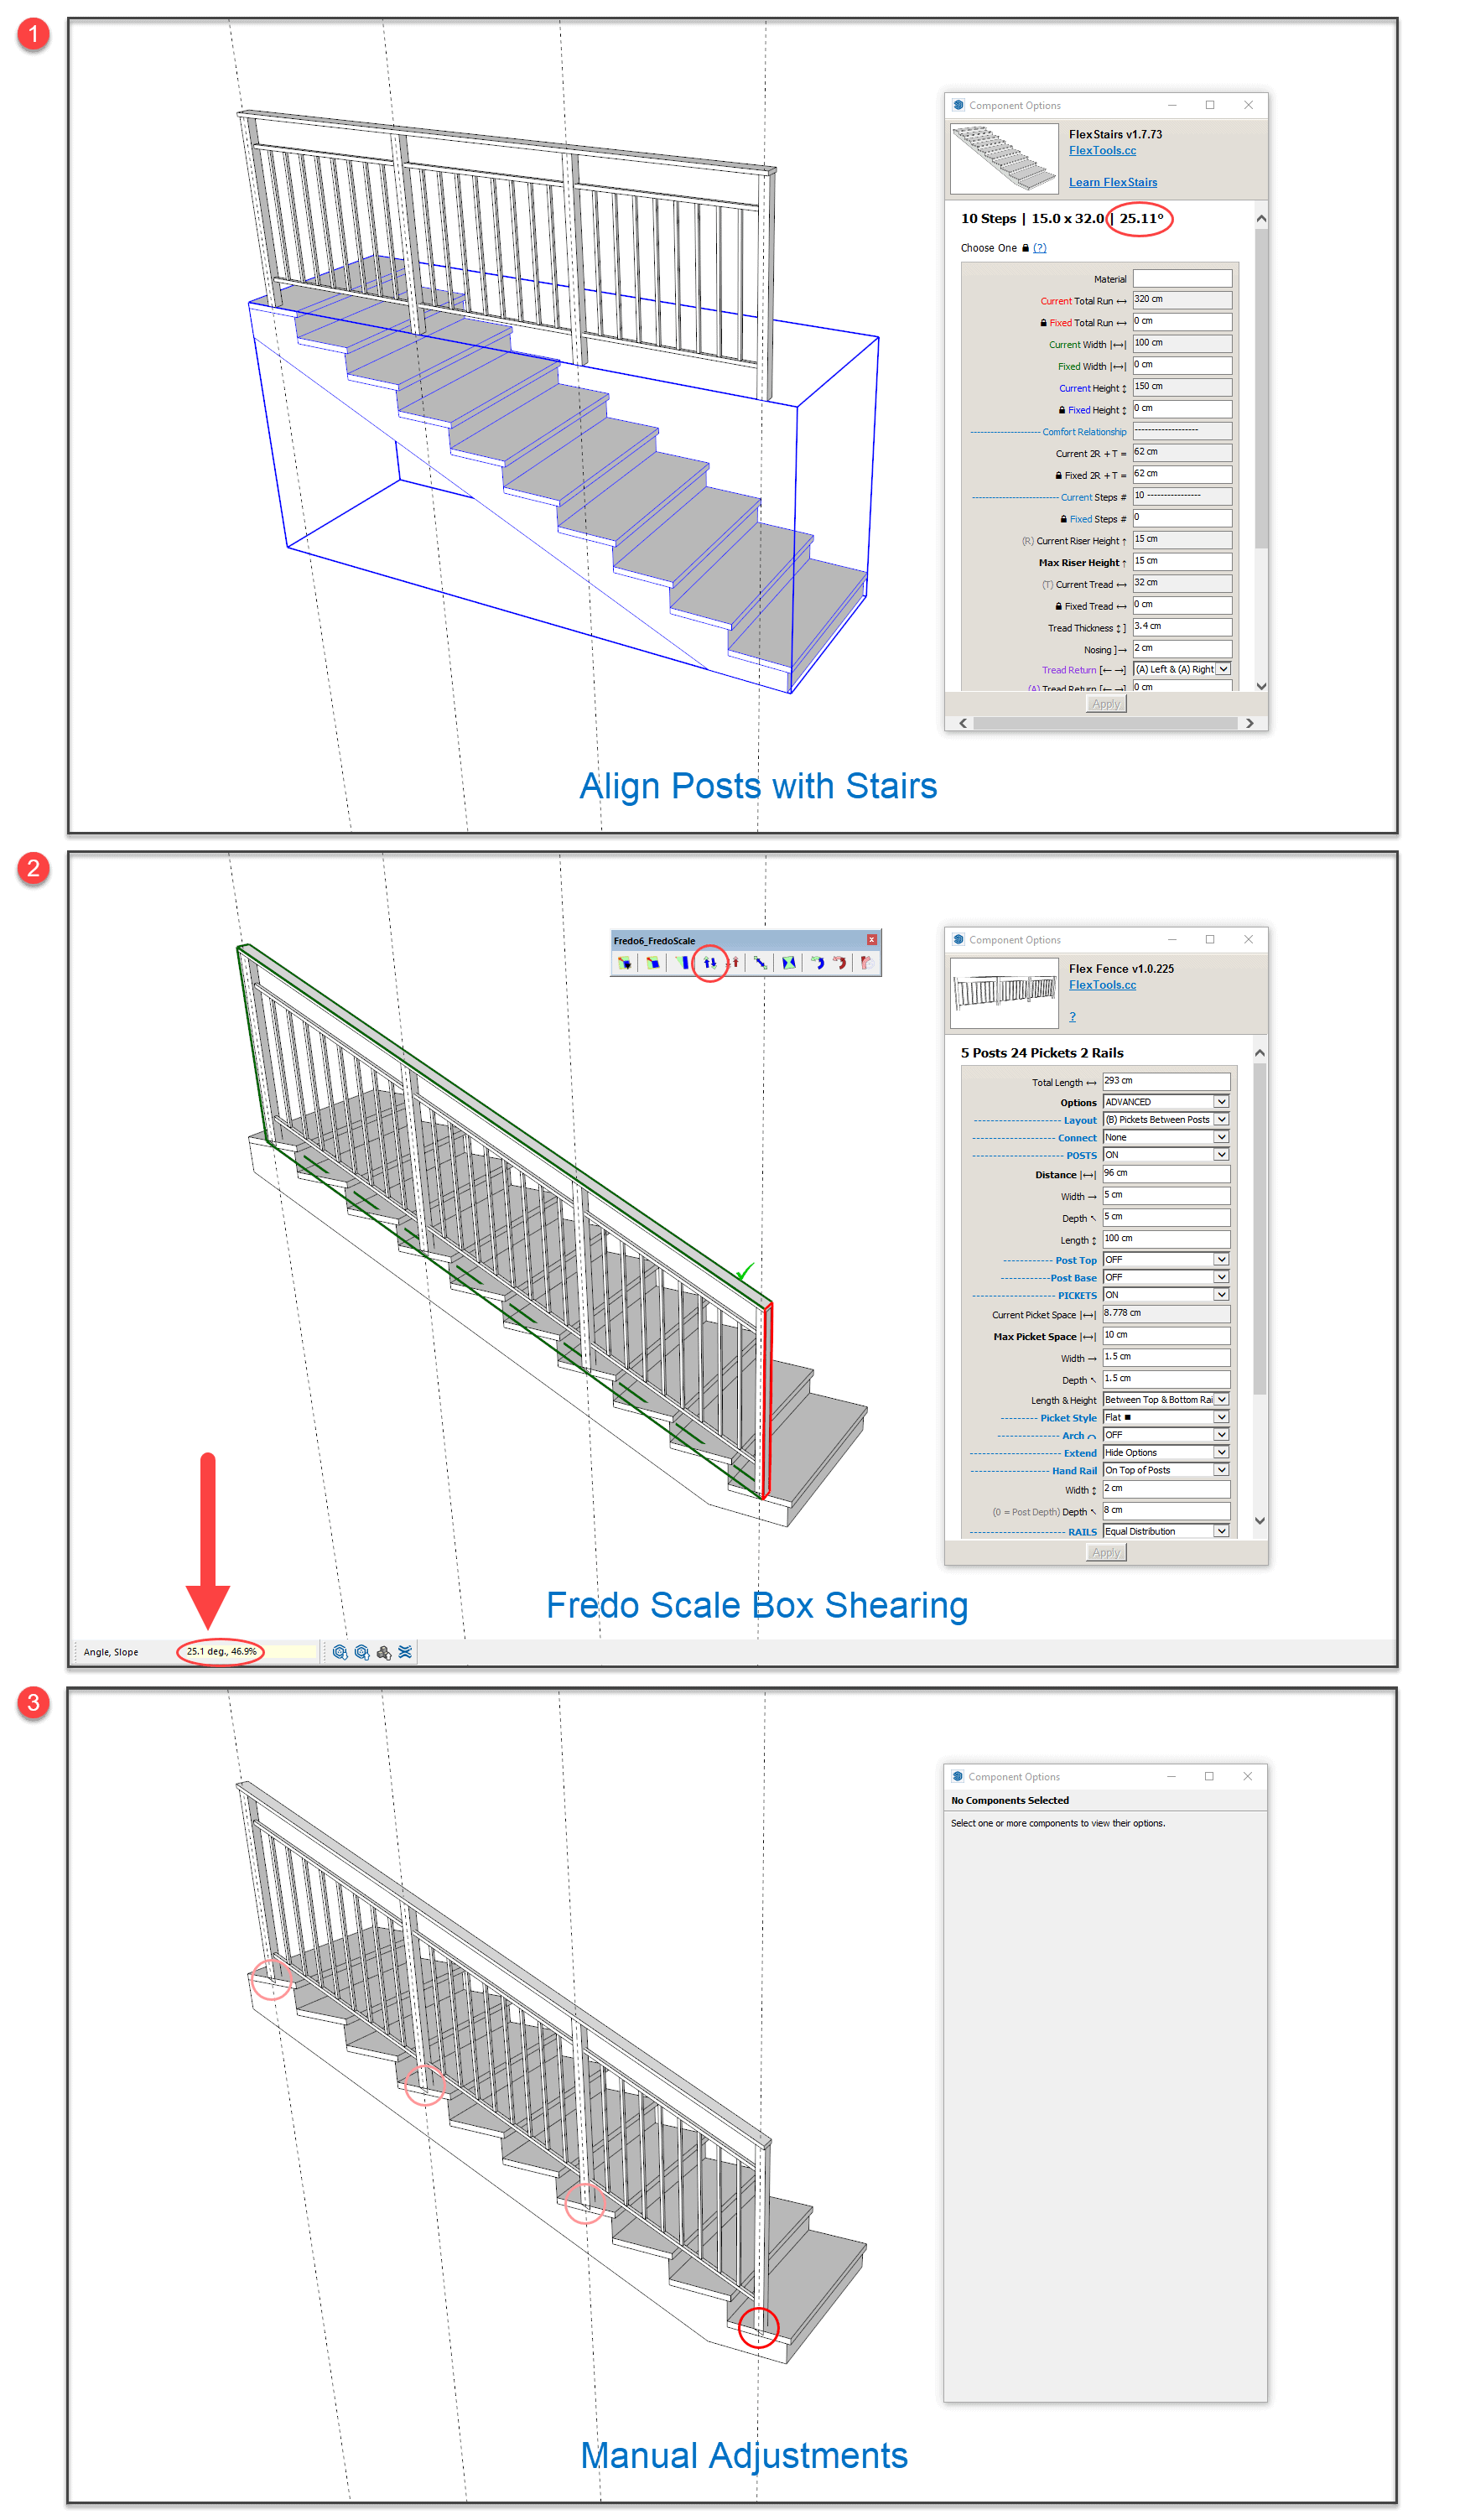
The FlexFence can be used on stairs with the help of the FredoScale extension.
- Scale and adjust the fence so its posts align with the steps.
- Take note of the angle of the stairs
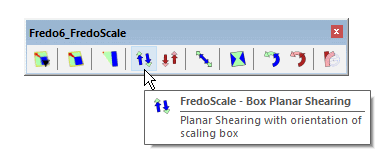
- Use the the FredoScale Box Shearing tool and enter the angle.
- Make manual edits to the geometry where needed (use the zap tool on sub-components if the edits will change the bounding box).
Advanced Options
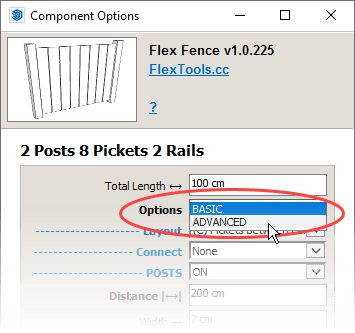
To make things easier for when you get started, we have hidden some of the settings that are used less often. To see all the settings, choose 'Advanced' and hit ENTER.
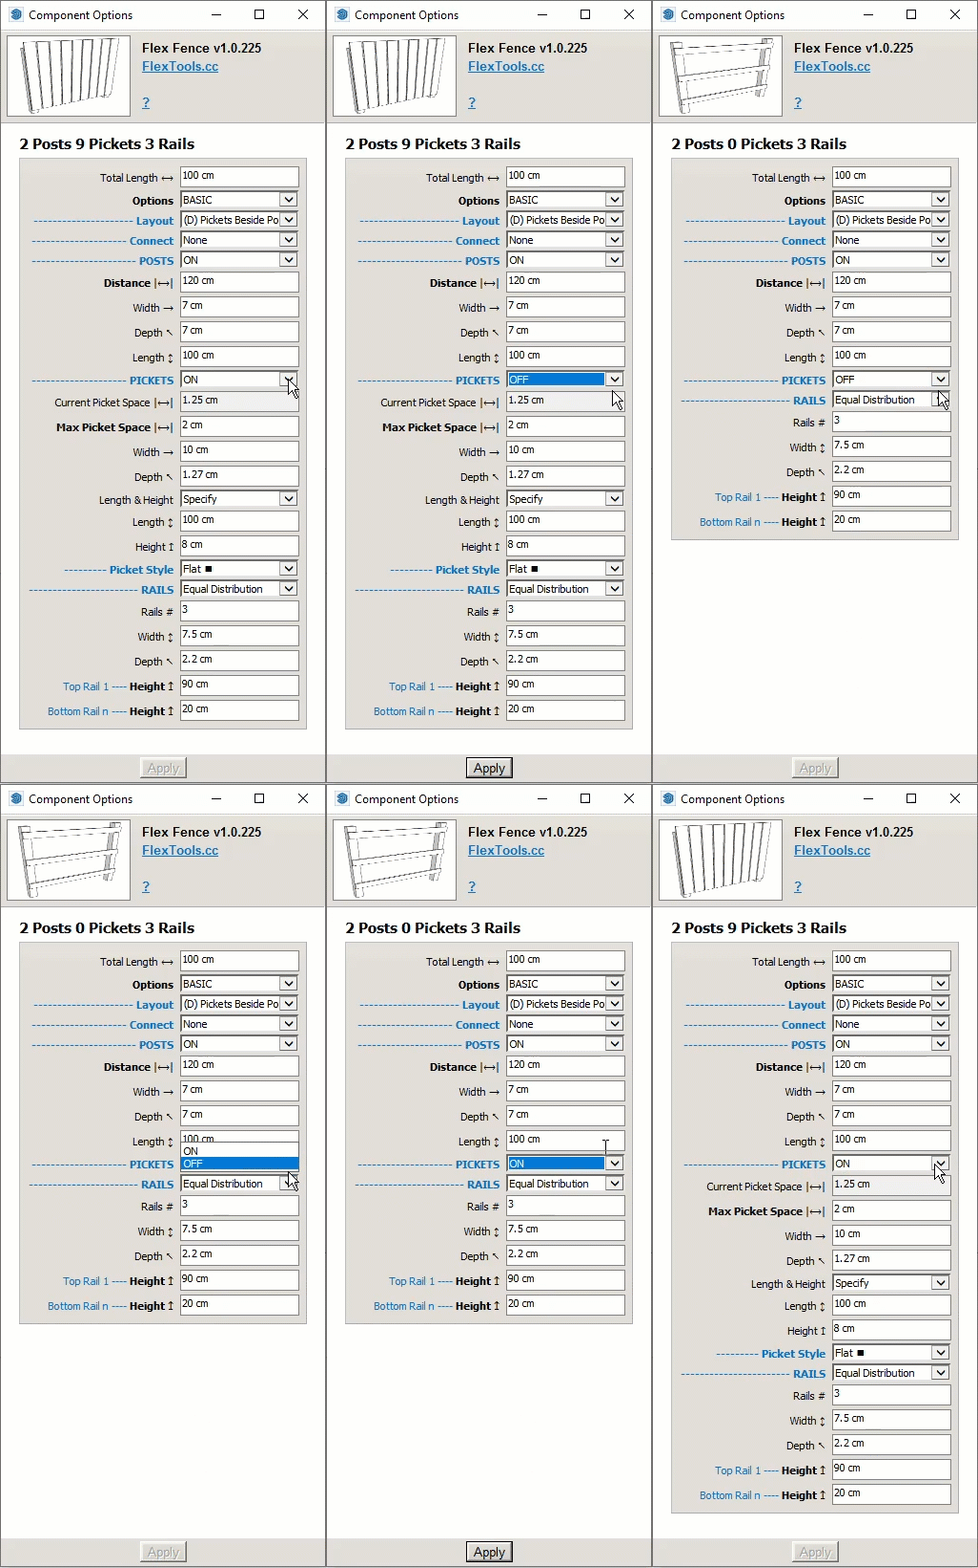
You will notice that other settings will also be shown or hidden depending on whether the main feature they are related to is ON or OFF. For example, if you turn off the pickets, all the settings related to pickets will disappear.
In the FlexFence Advanced Options you can add more details like:
- Post base and post top
- Picket arches (scalloped fence)
- Custom rail widths
- A hand rail
Full documentation on the FlexFence component is coming soon.
Flexfence Collection (Download)
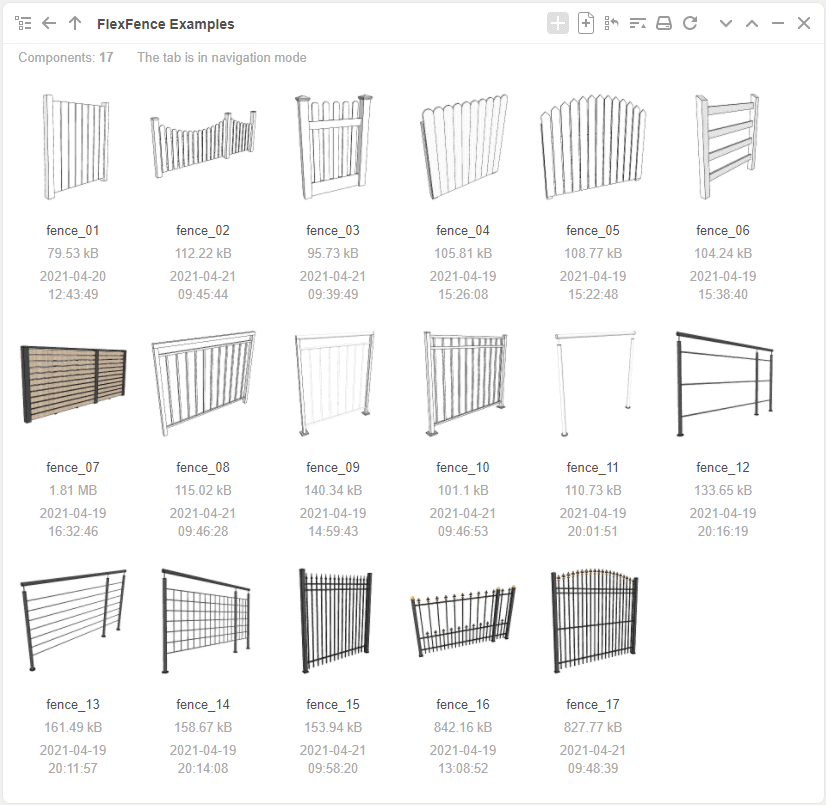
In addition to the default component from the FlexTools toolbar we are also releasing a collection of downloadable FlexFence examples so you could choose a fence/railing that best suits your design and continue customizing it from there.
What other fences/railings would you like to have dynamic? Let us know.
