
Cut instant dynamic openings through multi-layered walls quickly and easily!
Contents

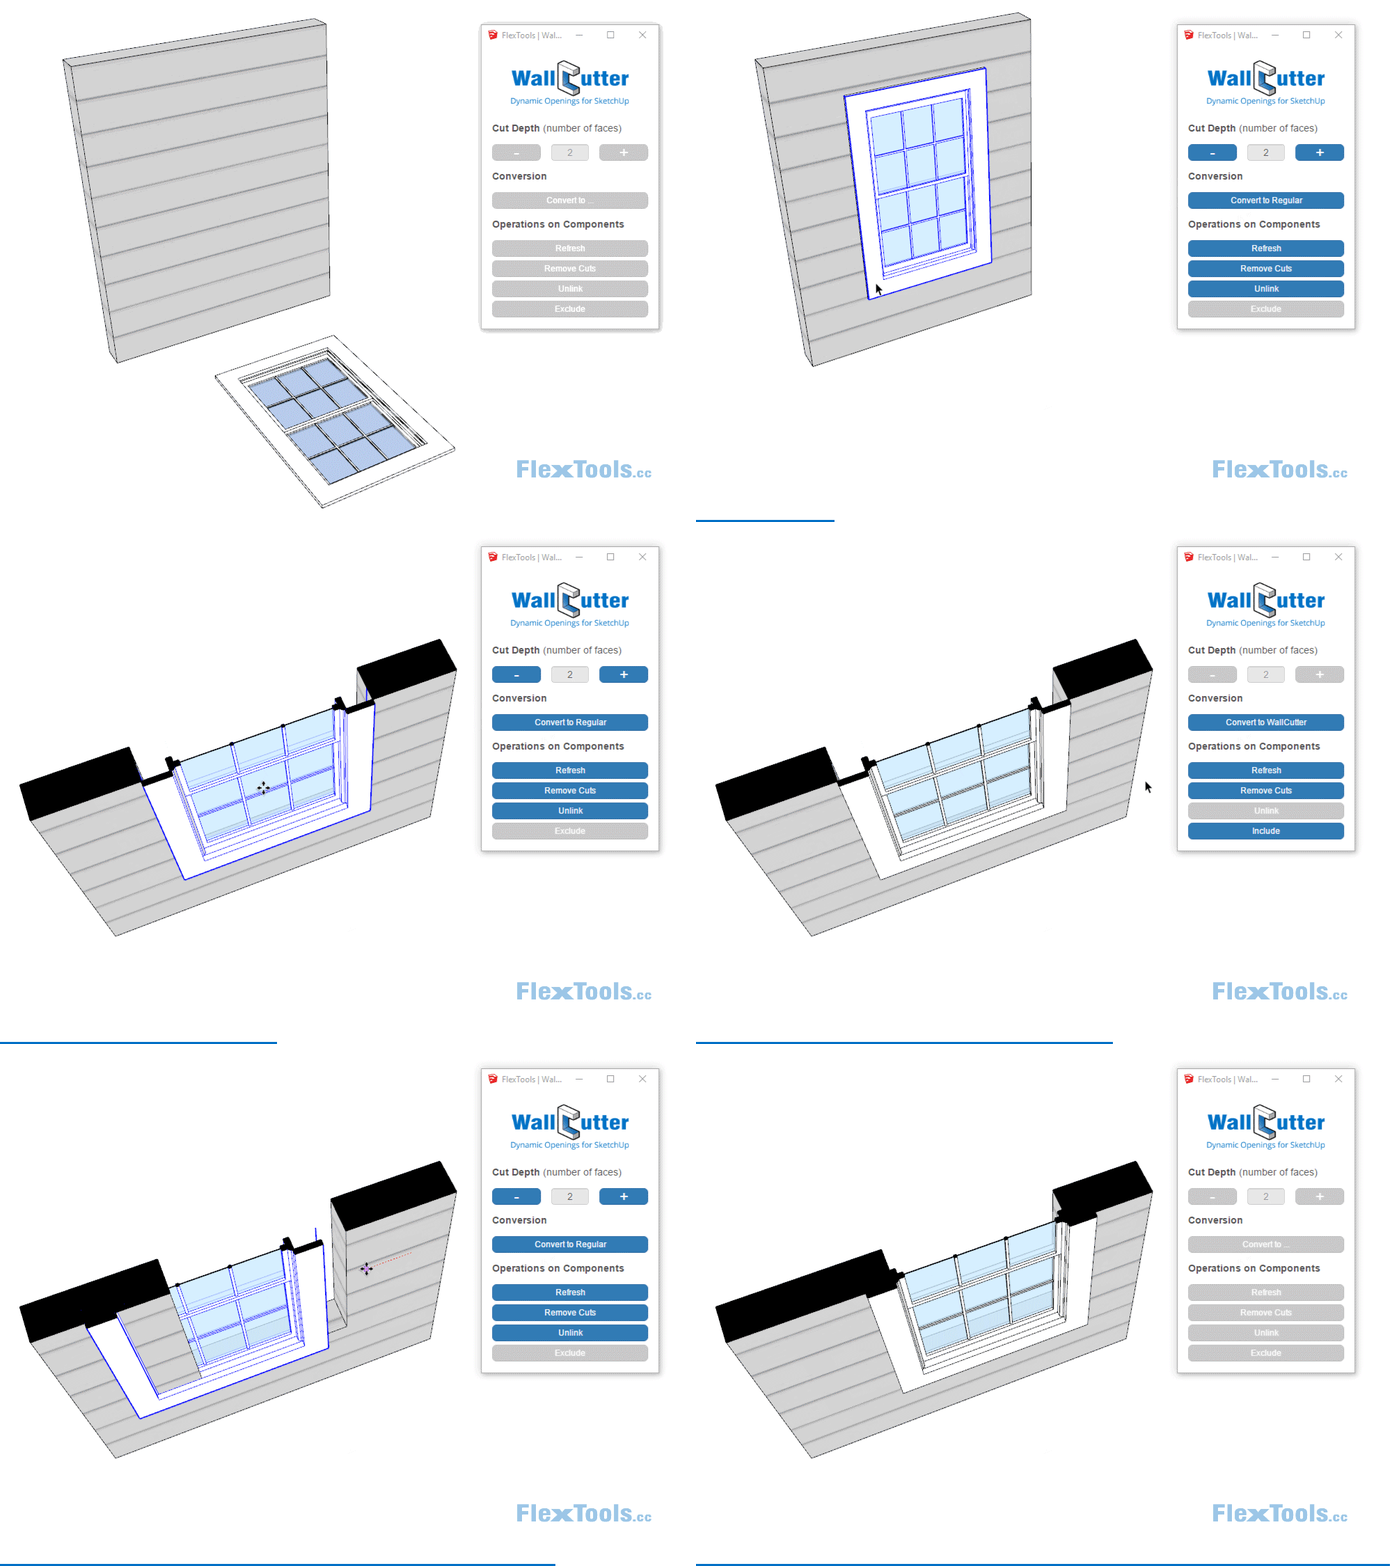
Control Panel

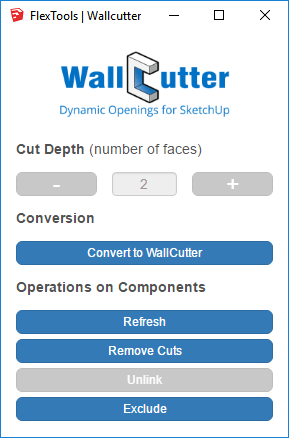
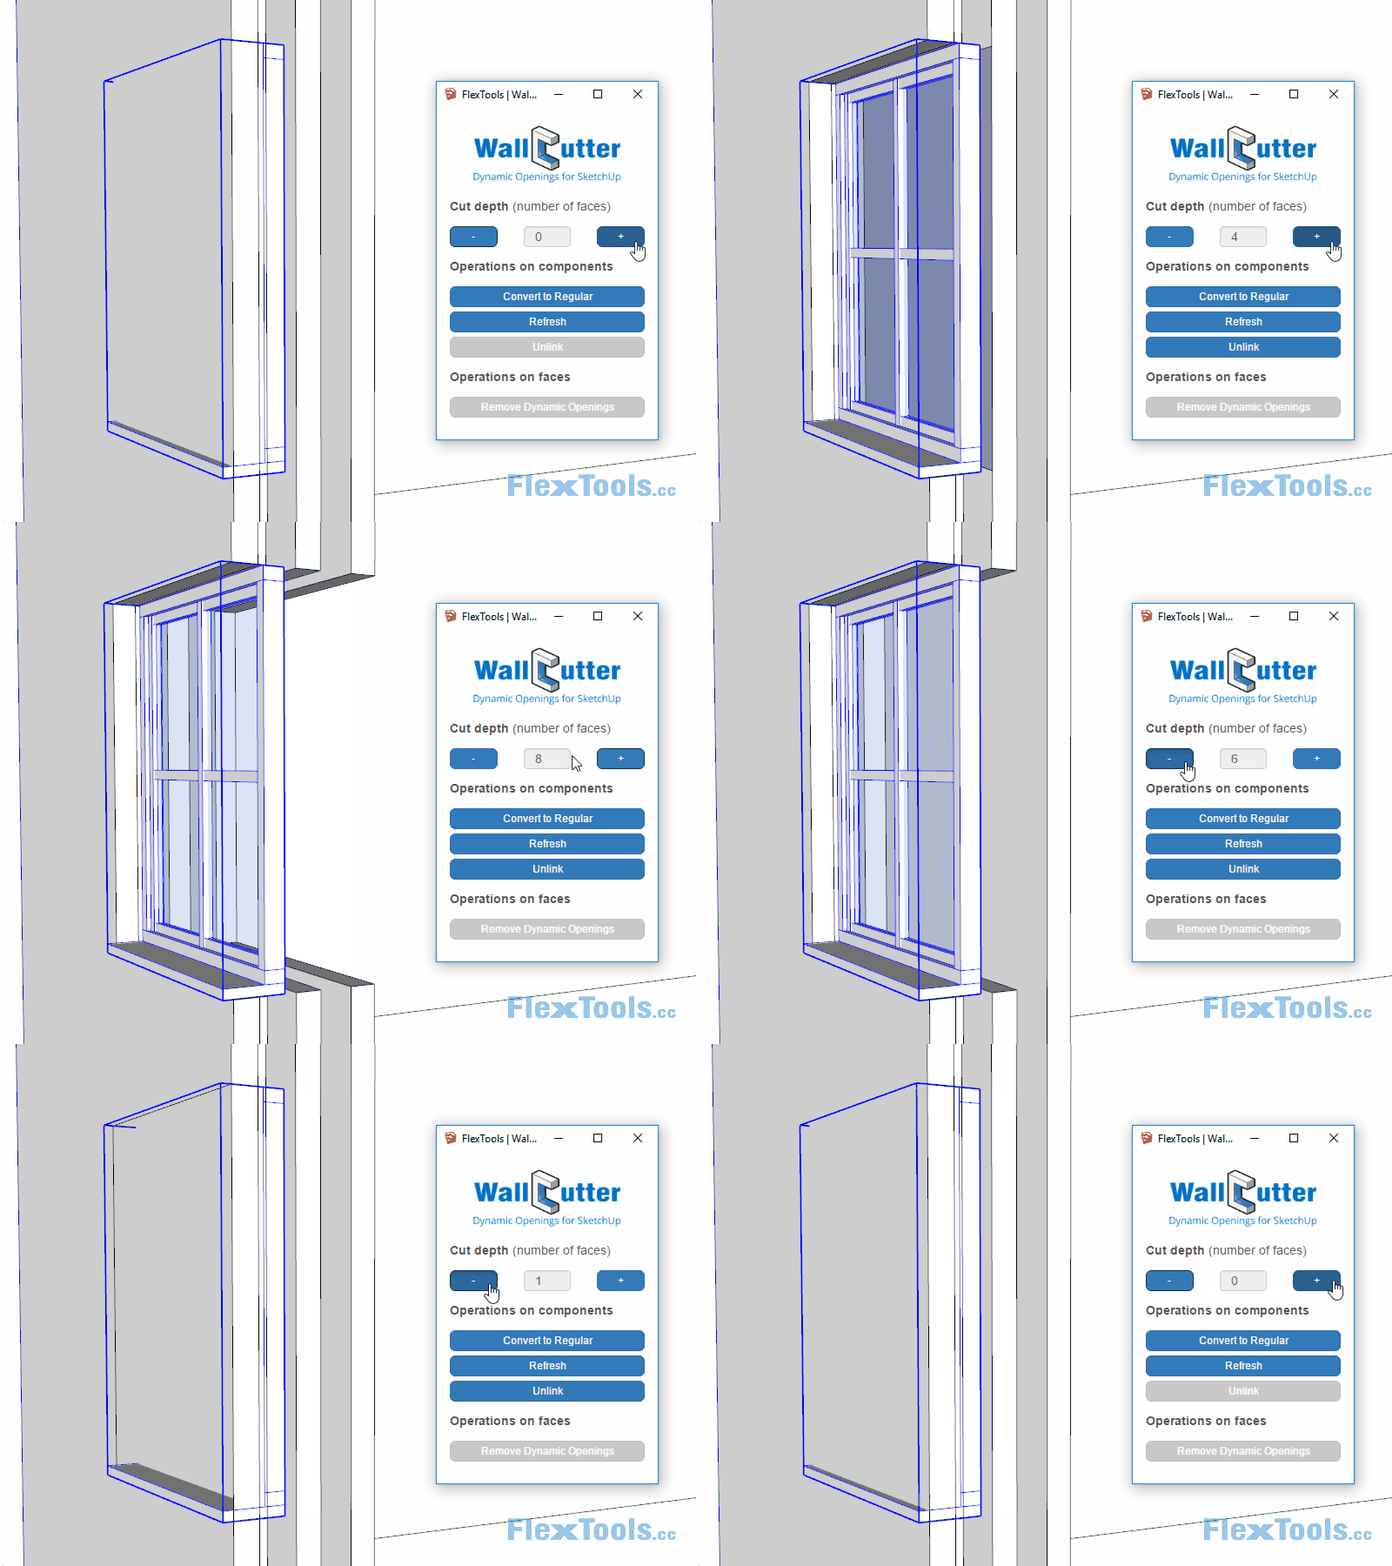
Cut Depth (-/+)
Set the number of faces to cut through (default = 2).
When saving a component, its 'cut depth' is saved along with it.
Convert to WallCutter / Regular
Convert any component to a 'WallCutter' or to a 'Regular Component'. See - How to apply WallCutter to any component
Refresh
Regenerate the openings for selected wall-cutting components. See - Advanced Operations
You can also use the Refresh Tool from the toolbar, but remember that it also refreshes DCs (can take time).
Remove Cuts
Removes dynamic openings of selected components. See - Advanced Operations.
Unlink
Disconnect components from their openings. If you move or delete the components after unlinking, the openings remain static and unchanged.
Exclude / Include
Mark sub-components to be excluded from the WallCutter algorithm so they will not affect the opening being cut. Good for situations of window trim, sill horns etc.
Show/Hide Cut Edges & Cut Faces
Sometimes you want to hide the edges and/or faces of the dynamic opening. You would use this for example with the pocket door - this way when running a section through it, the wall and the pocket geometry will look as one without any lines separating between them. You could also use these settings to present a door as having a hidden frame.
Interactive SKP Tutorial
This tutorial will walk you through the basic functions and workflow of WallCutter right inside Sketchup. It requires that you have FlexTools and WallCutter installed.
How to Apply WallCutter to Any Component
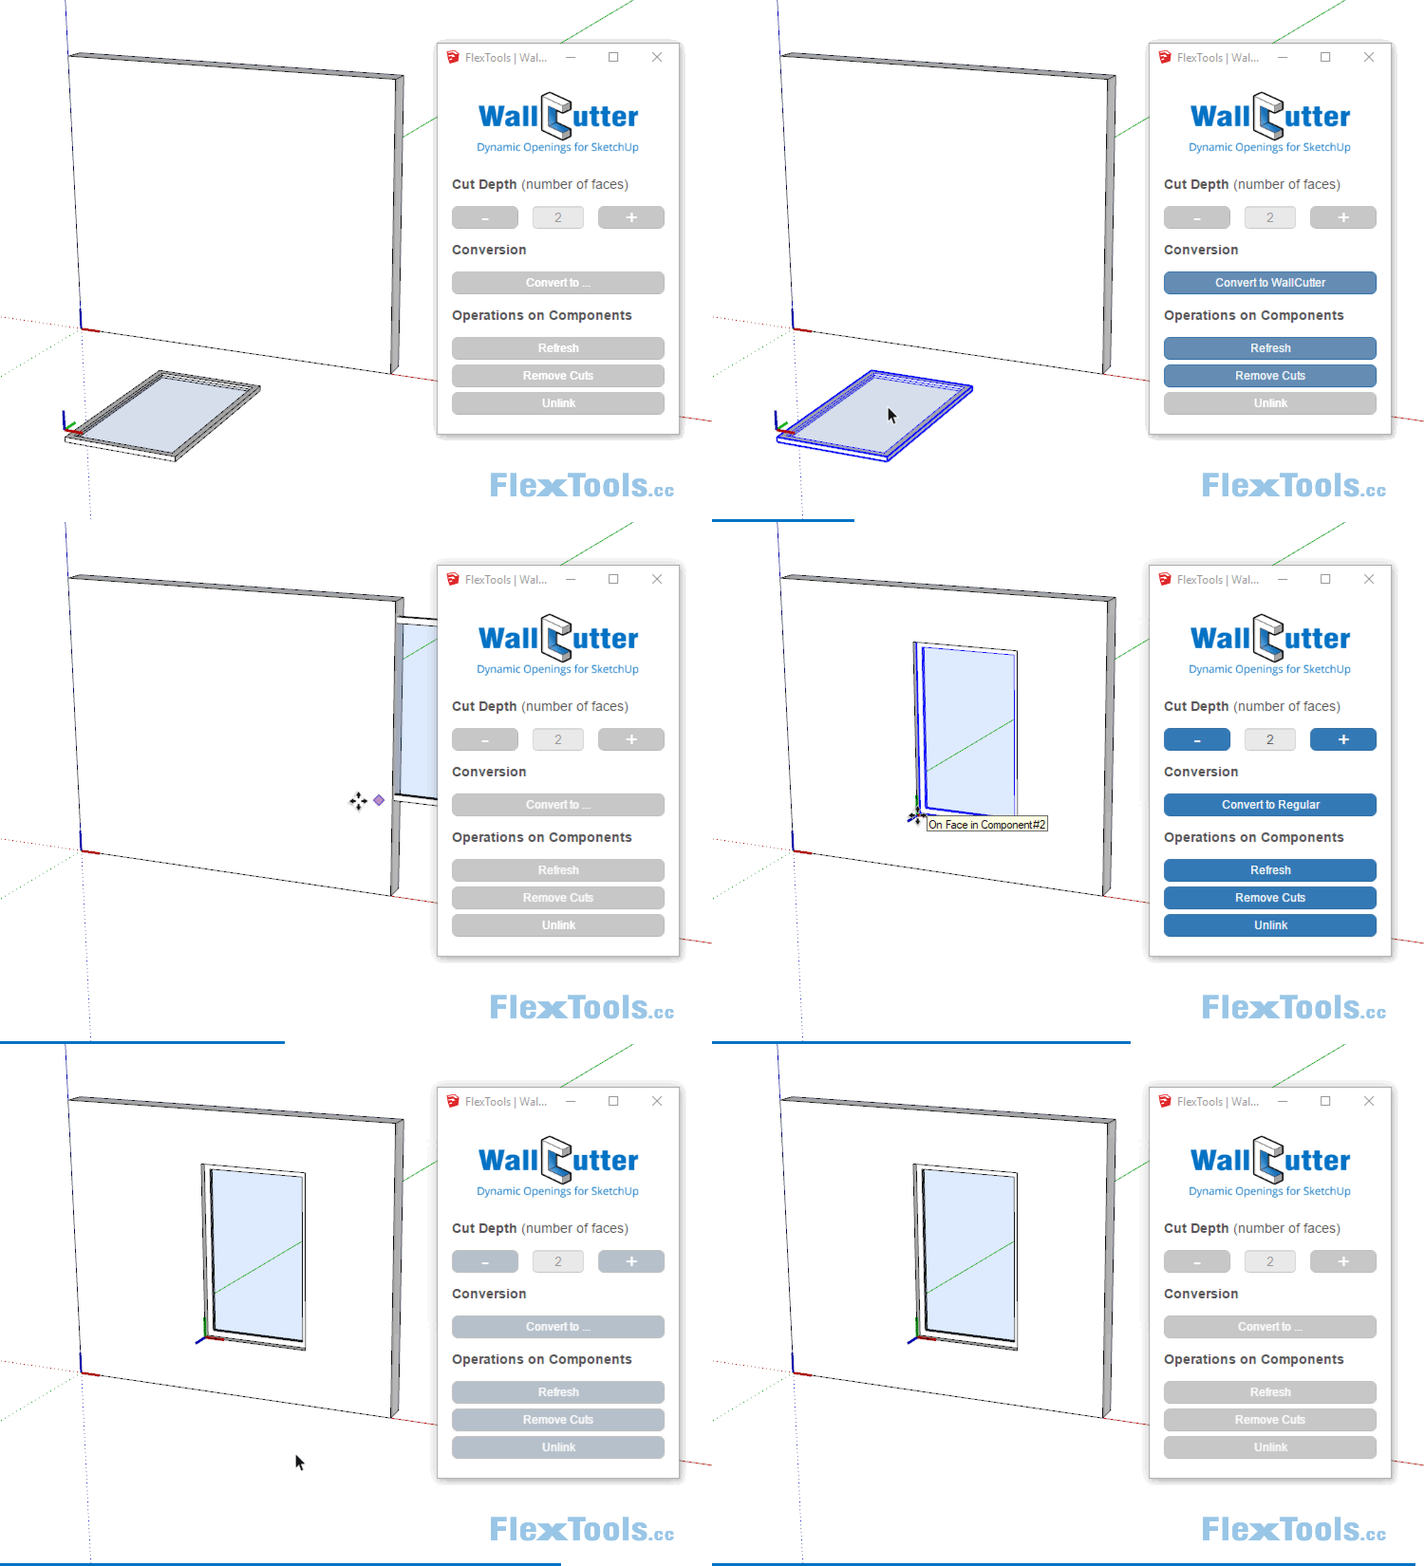
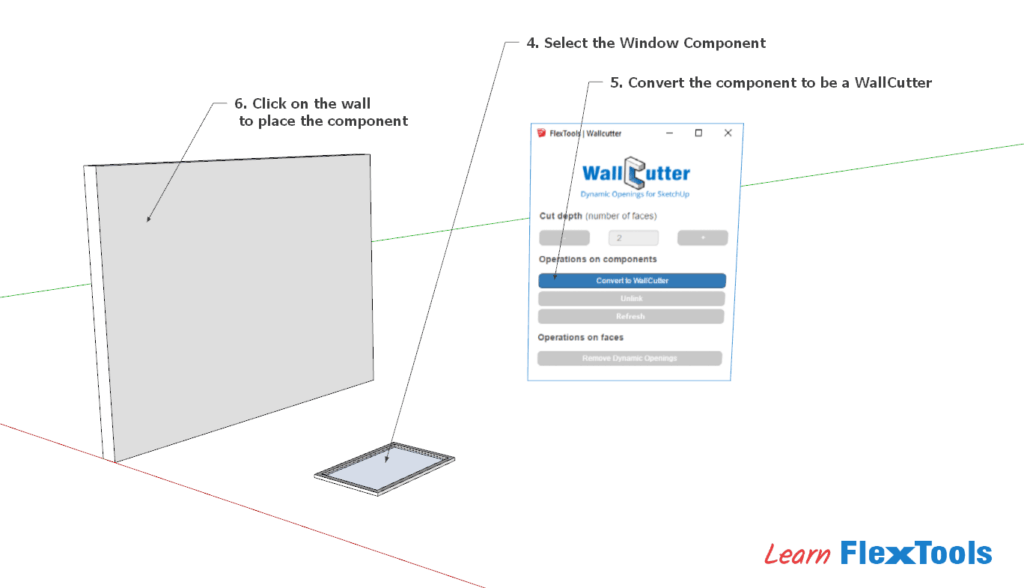
1. Set the XY plane (Red & Green axes) to be parallel with the wall's surface.
2. Set the Z axis (Blue) to be perpendicular to the wall's surface.
3. Click on
Done!
📌 A WallCutter component 'glues' to a wall at it's Axes Point XYZ.
📌 The wall's faces (normals) must be pointing OUT (In 'monochrome view' the faces would be white on the outside and colored on the inside).
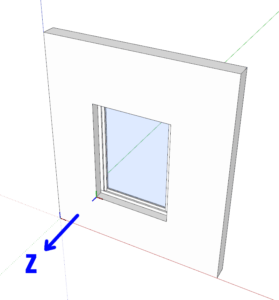
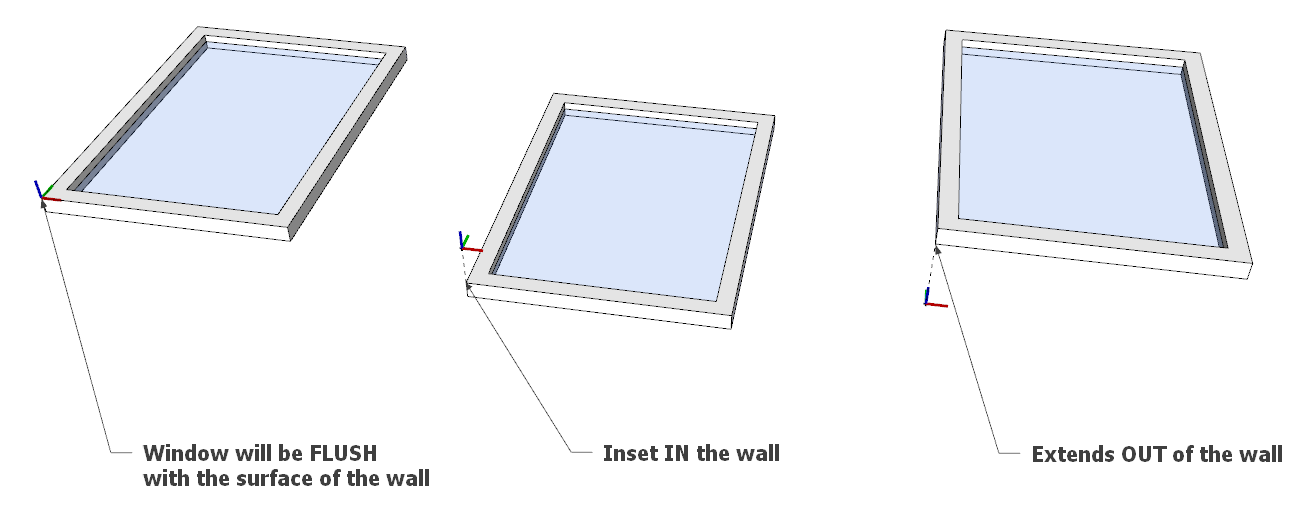
The window's Z axis (Blue) is perpendicular to the wall's surface.
Setting a window's position in relation to the surface of a wall along the Z axis (Blue).
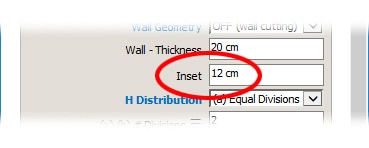
Setting a Flex component's position in relation to the surface of a wall with the 'Inset' setting.
Advanced Operations
Copying, Mirroring, Exploding, Making unique, Changing a wall thickness are operations that can cause WallCutter components to 'not work' as expected or to 'break', meaning that their openings may stop being dynamic, or that some wall geometry may get deleted.
In order for these, and similar operations to work as you would expect them to:
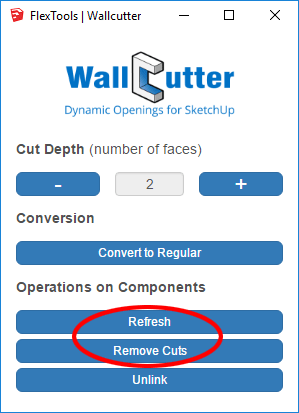
1. Before making changes like mentioned above, first remove the dynamic openings by clicking on
2. Make the Changes you need
3. After the changes are done, restore the dynamic openings by clicking on
Let's see a few examples below 👇
How to COPY a wall and its wall-cutting components
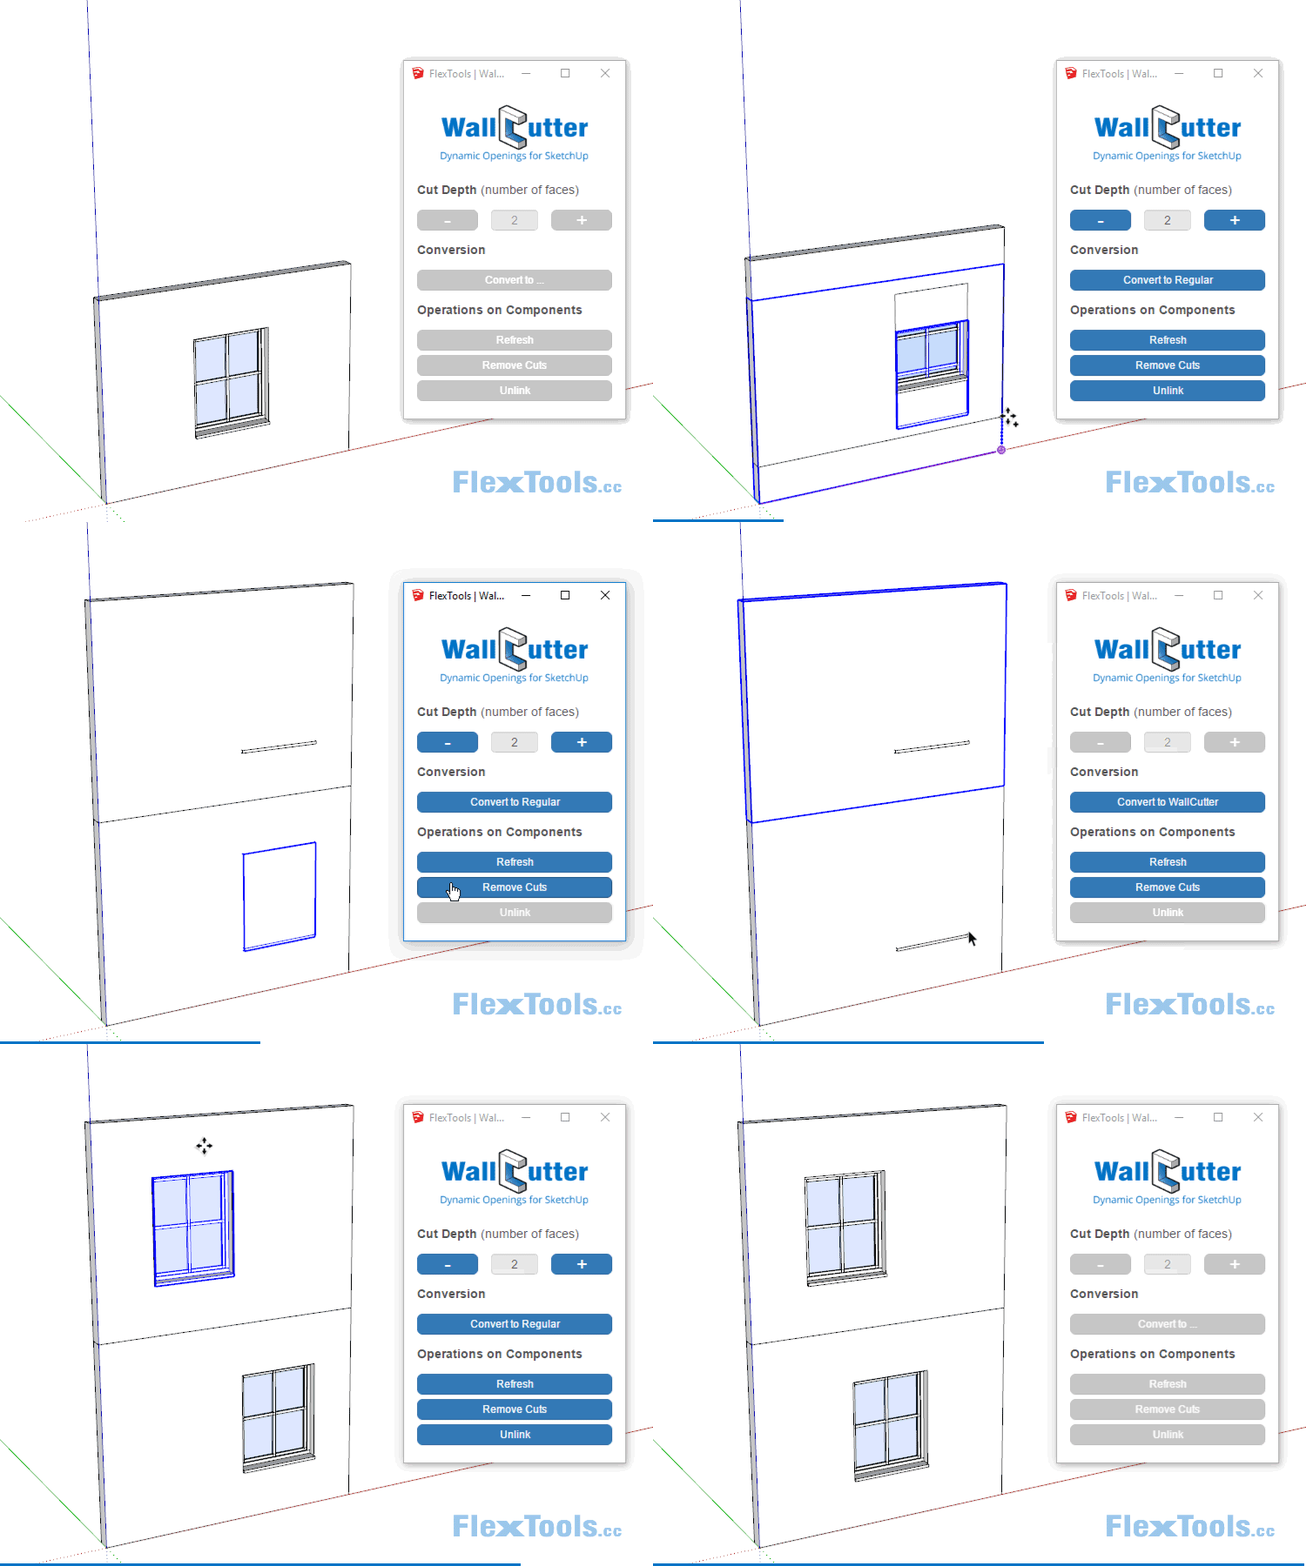
1. Copy Wall and Window Components to a new location
2. Select Original Window >
3. Select New Wall > Right Click > 'Make Unique'
4. Select All Windows >
📌 If you want the copies to stay the same, simply make a new component out of them and copy it around the model. If you want to make one of the new components unique, see below.
How to make a component that has walls and wall-cutting components in it UNIQUE
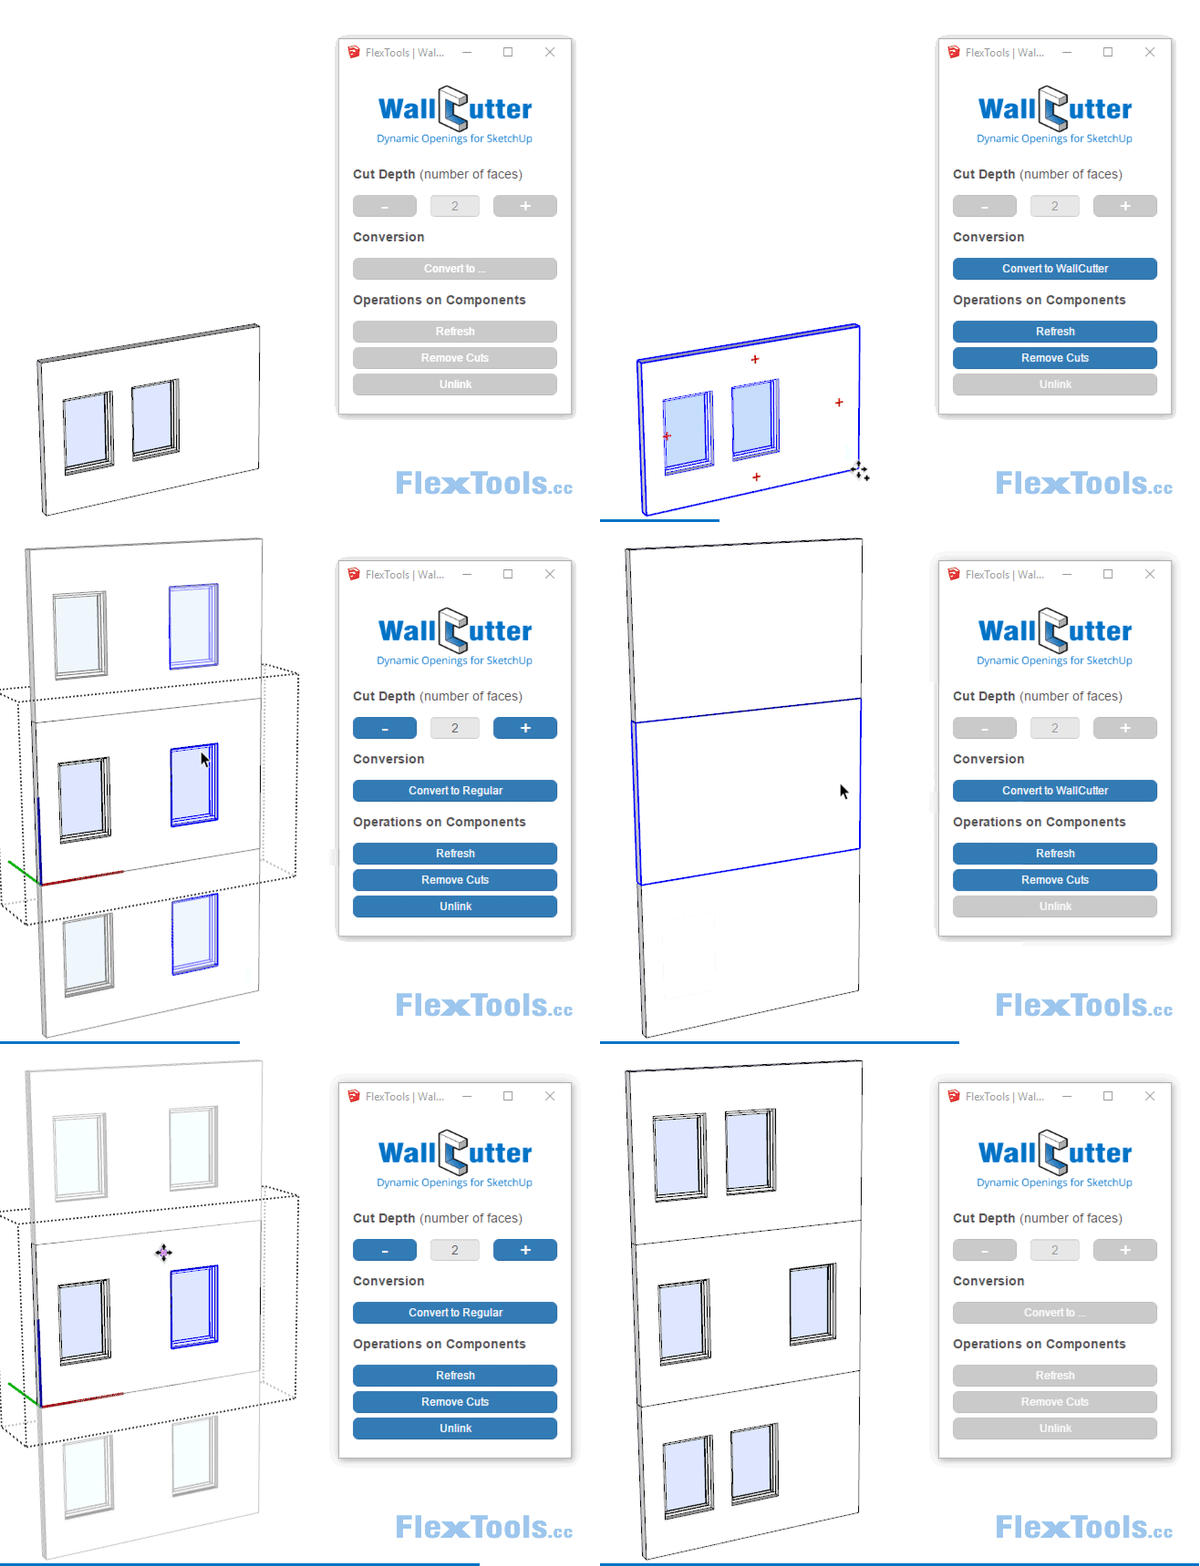
1. Make copies of the containing component
2. Select any copy >
3. Select a copy to make unique > Right Click > 'Make Unique'
4. Double click into the component > Select the wall > Right Click > 'Make Unique'
5. Select all components >
How to copy WallCutters between models
1. Select the WallCutter components >
2. Copy the Walls and WallCutters with CTRL+C
3. Switch to the new model > CTRL+V or 'Paste in Place'
4. Select all components and walls >
How to EXPLODE a component that has wall-cutters in it
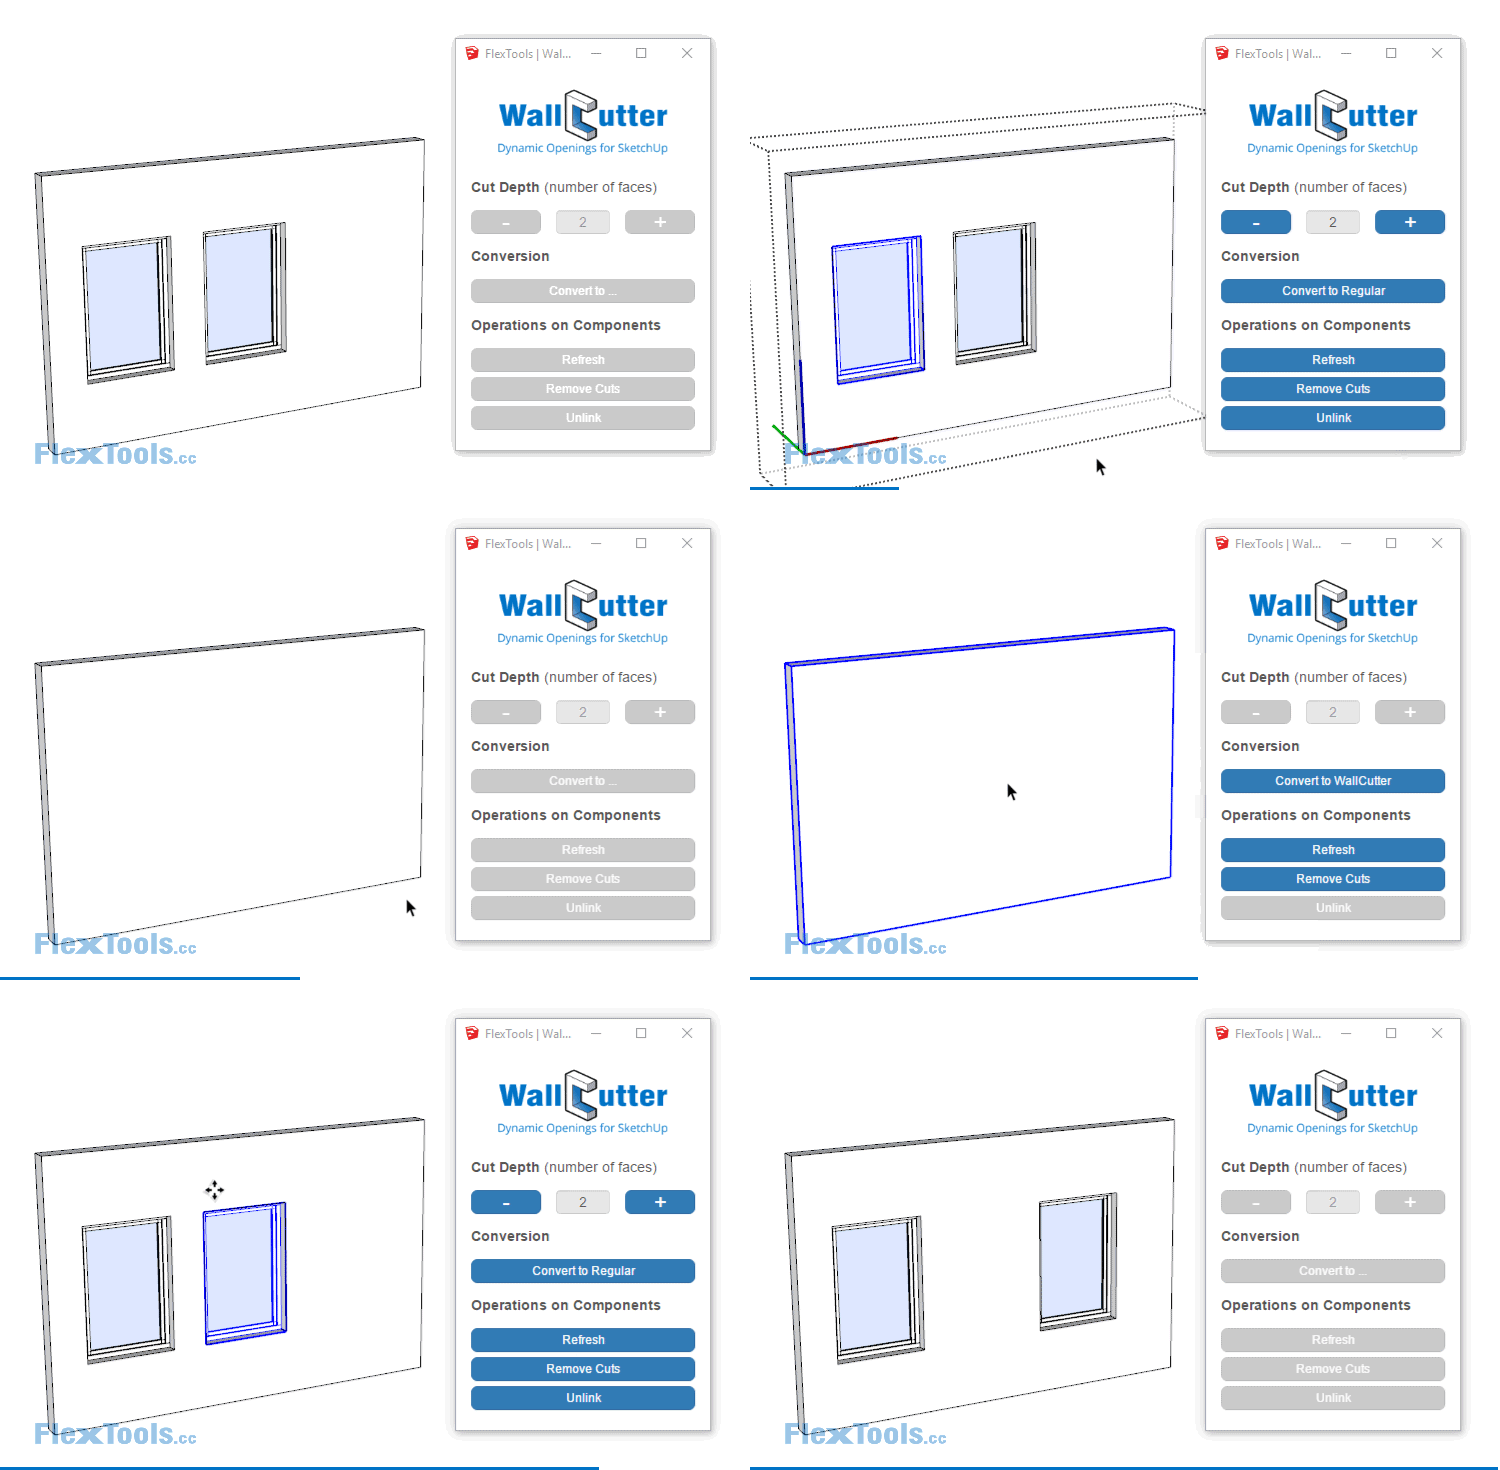
1. Select the containing component >
2. Explode the containing component > Right Click > 'Explode'
3. Select all the window components >
How to CHANGE the THICKNESS of a wall that has wall-cutters on it
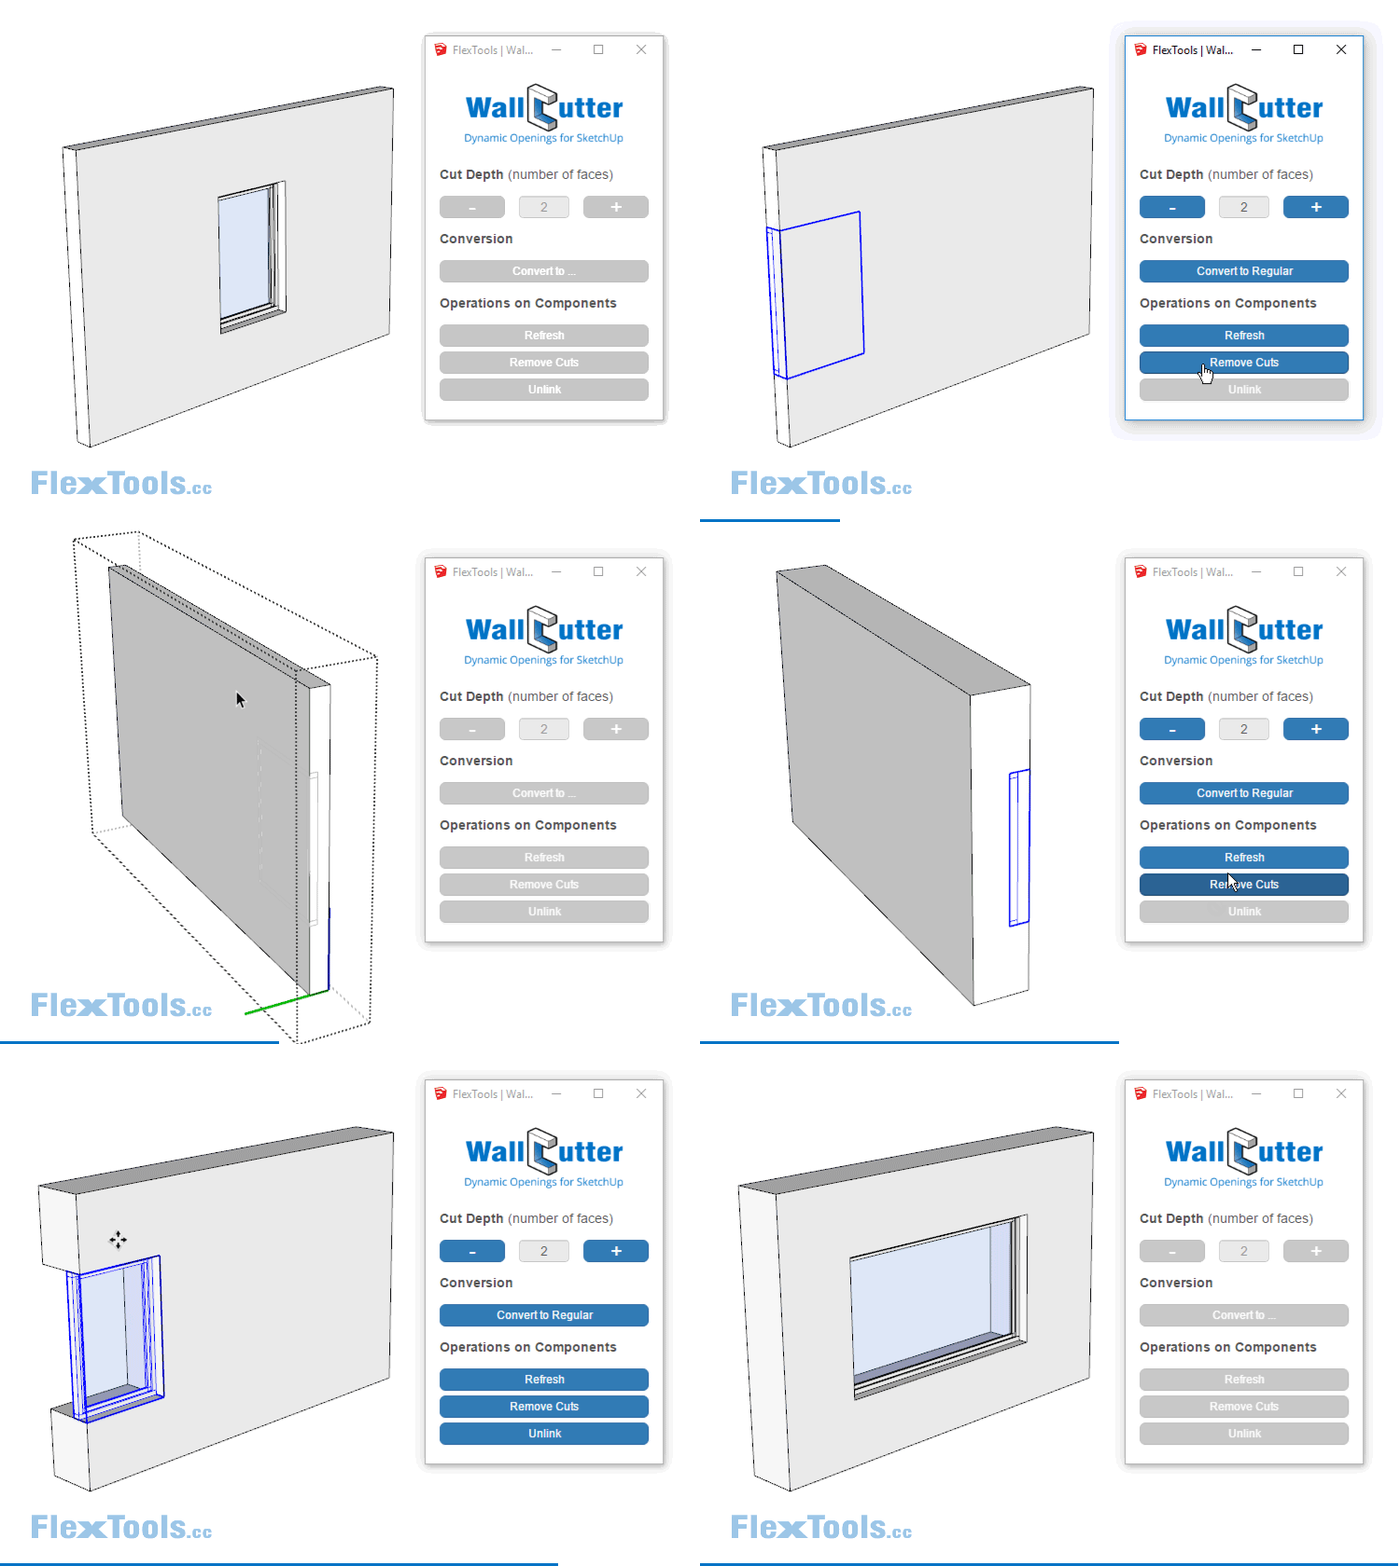
1. Select the window components >
2. Double Click into the wall component > Change the wall thickness
3. Select all the window components >
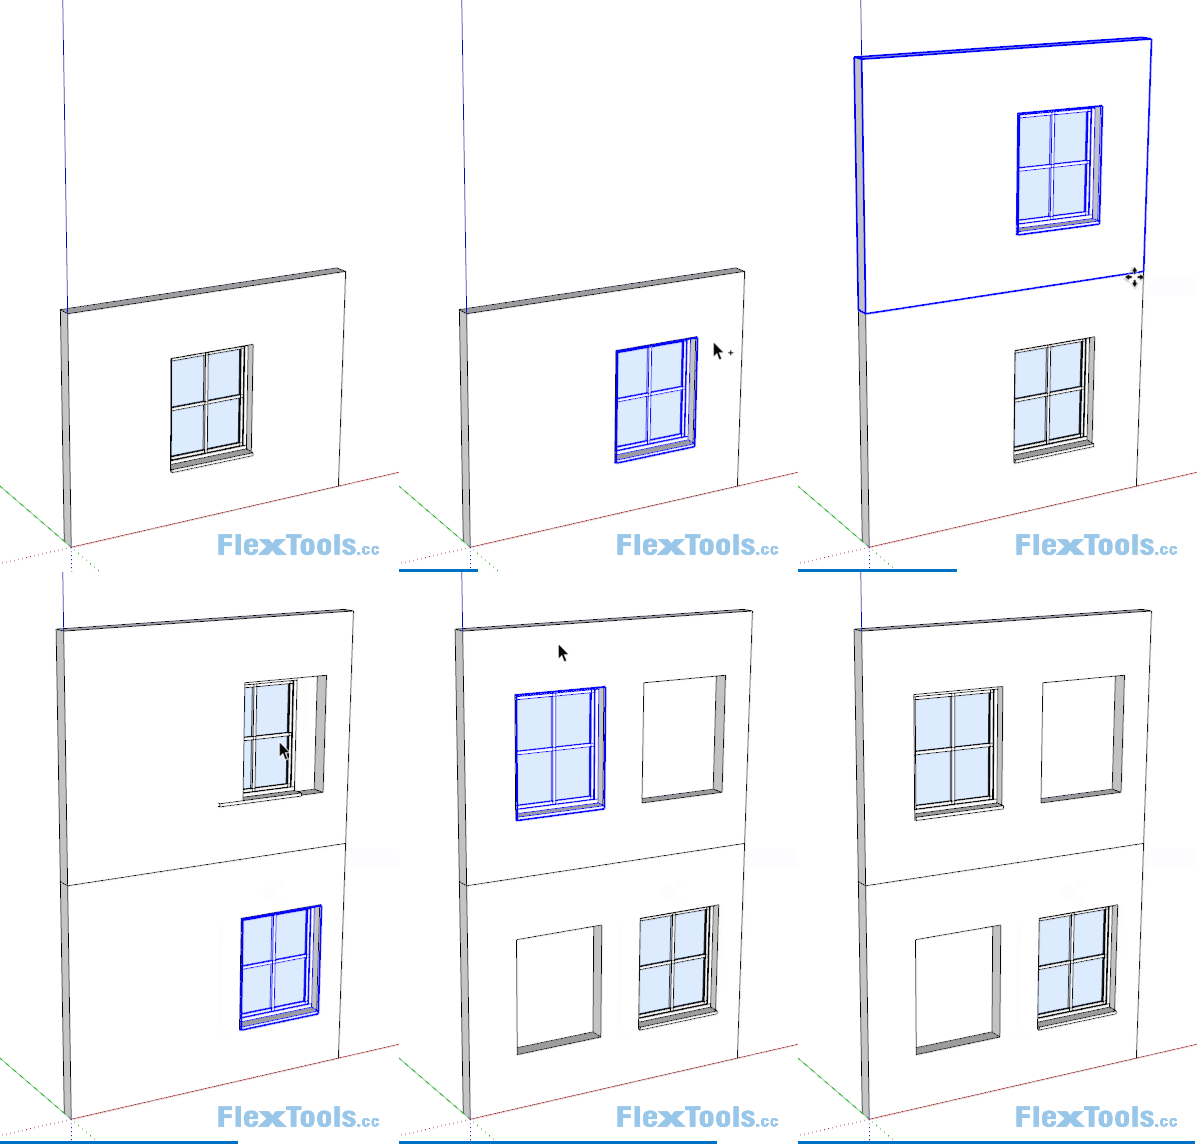
How NOT to COPY a wall and its wall-cutting components
Making copies the wrong way can cause interesting results
Notes
- A wall's faces (normals) must be pointing OUT - In 'monochrome view' the faces would be 'light' on the outside and 'dark' on the inside.
- Wall components do not have to be solids. If they are, WallCutter maintains their solidity.
- Scaling multiple WallCutter components may cause them to un-glue.
- Mirroring WallCutter components may cause the the mirrored components to become un-glued and the openings will not be generated immediately. Refresh the components and the openings will regenerate.
- It does not cut if there are lines on the wall where the component is supposed to be placed. It is highly recommended to work with 'clean' walls - remove any unneeded stray lines before applying wall-cutting components onto them.
- WallCutter currently works with convex hulls only.
- WallCutter cuts through planar faces only - It does not cut through curved or fragmented surfaces.
- Saving Components with WallCutters inside them causes the dynamic openings to stop functioning when pulled into a new model - You can get around this by removing cuts right before saving.
Contents

