
FlexDoors
FlexDoor & FlexDoor Glass
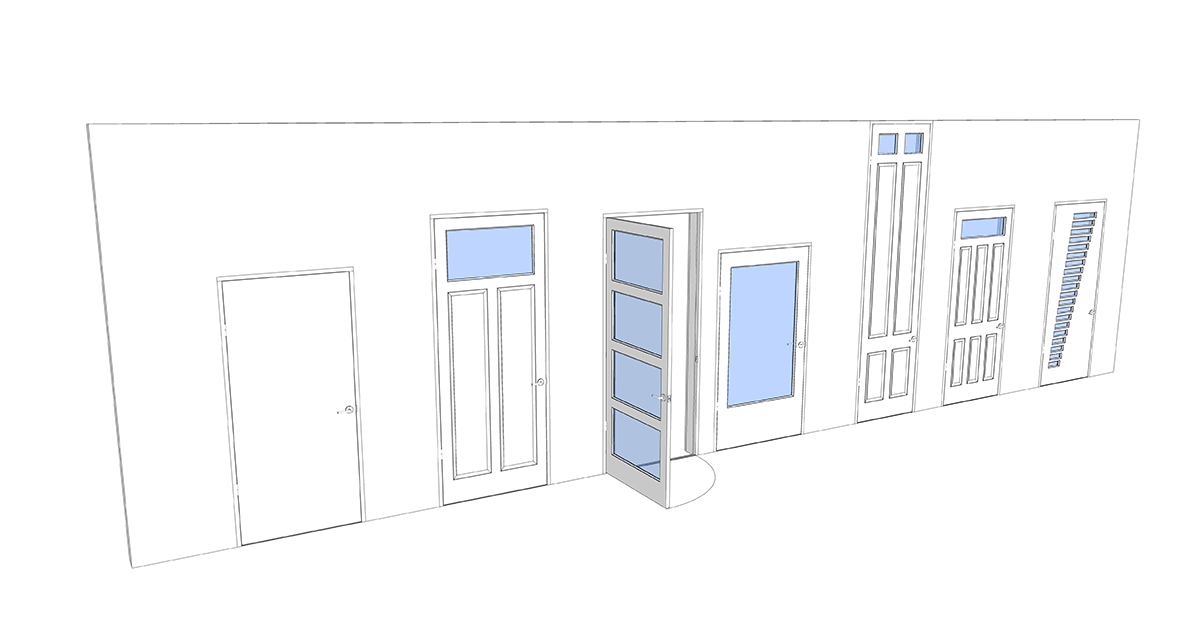
Create various types of dynamic doors - interior and exterior, traditional and modern style with glass divisions or solid panels.
After adjusting each door to your needs, save it aside with ComponentFinder for later immediate use.
Contents
Door Layout
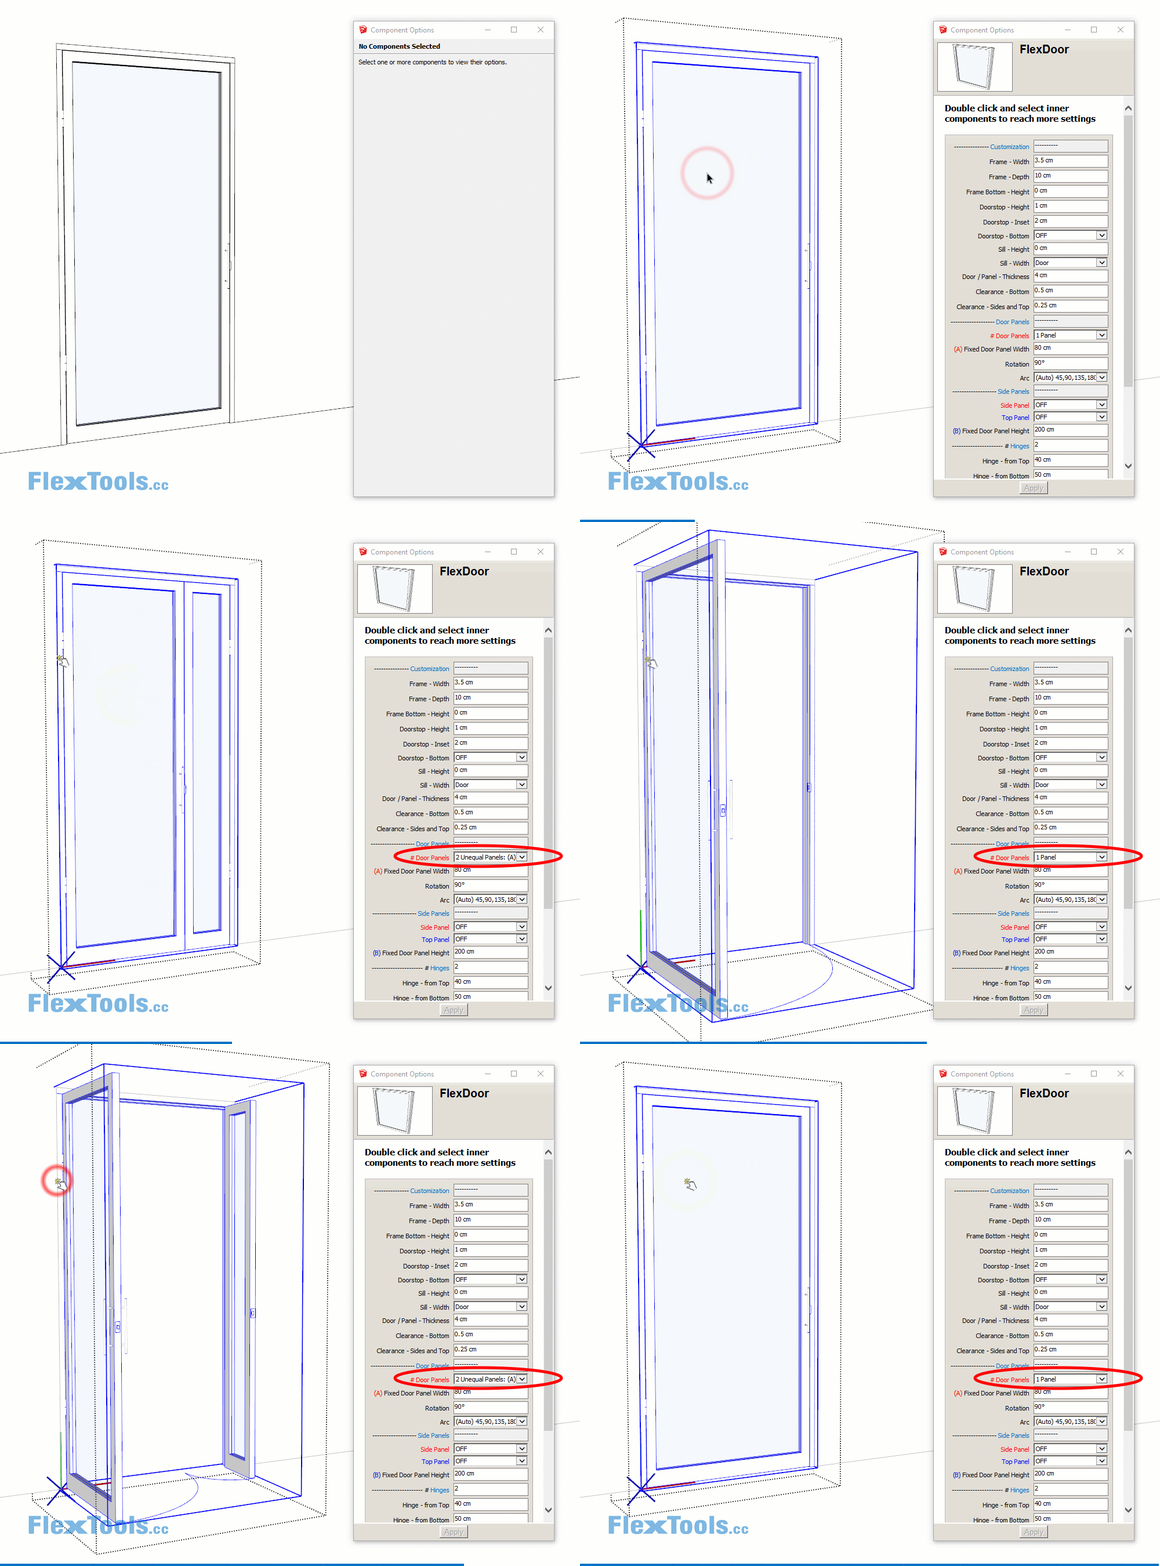
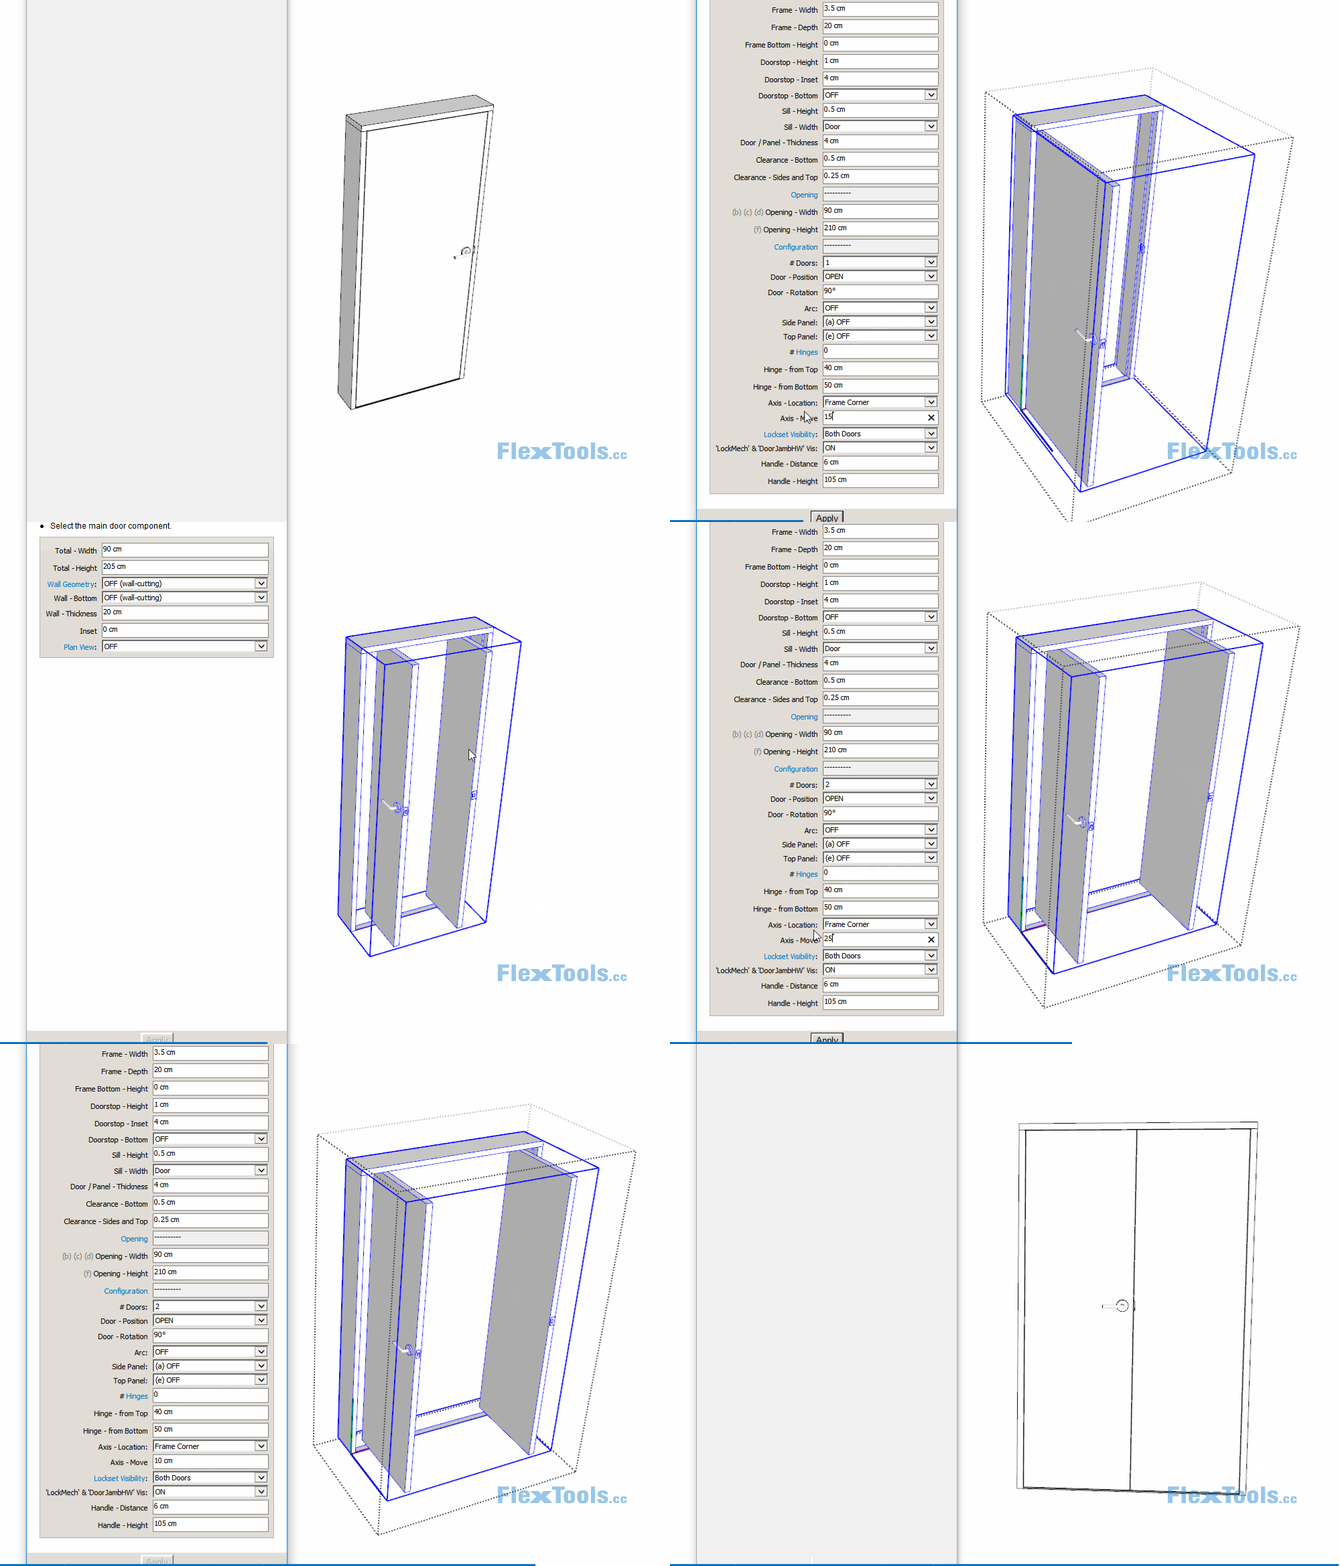
Choose the basic layout of your door. Double click on the door component and select the insides to see more settings. Some of the settings can also be changed by clicking with the Interact Tool (see below).
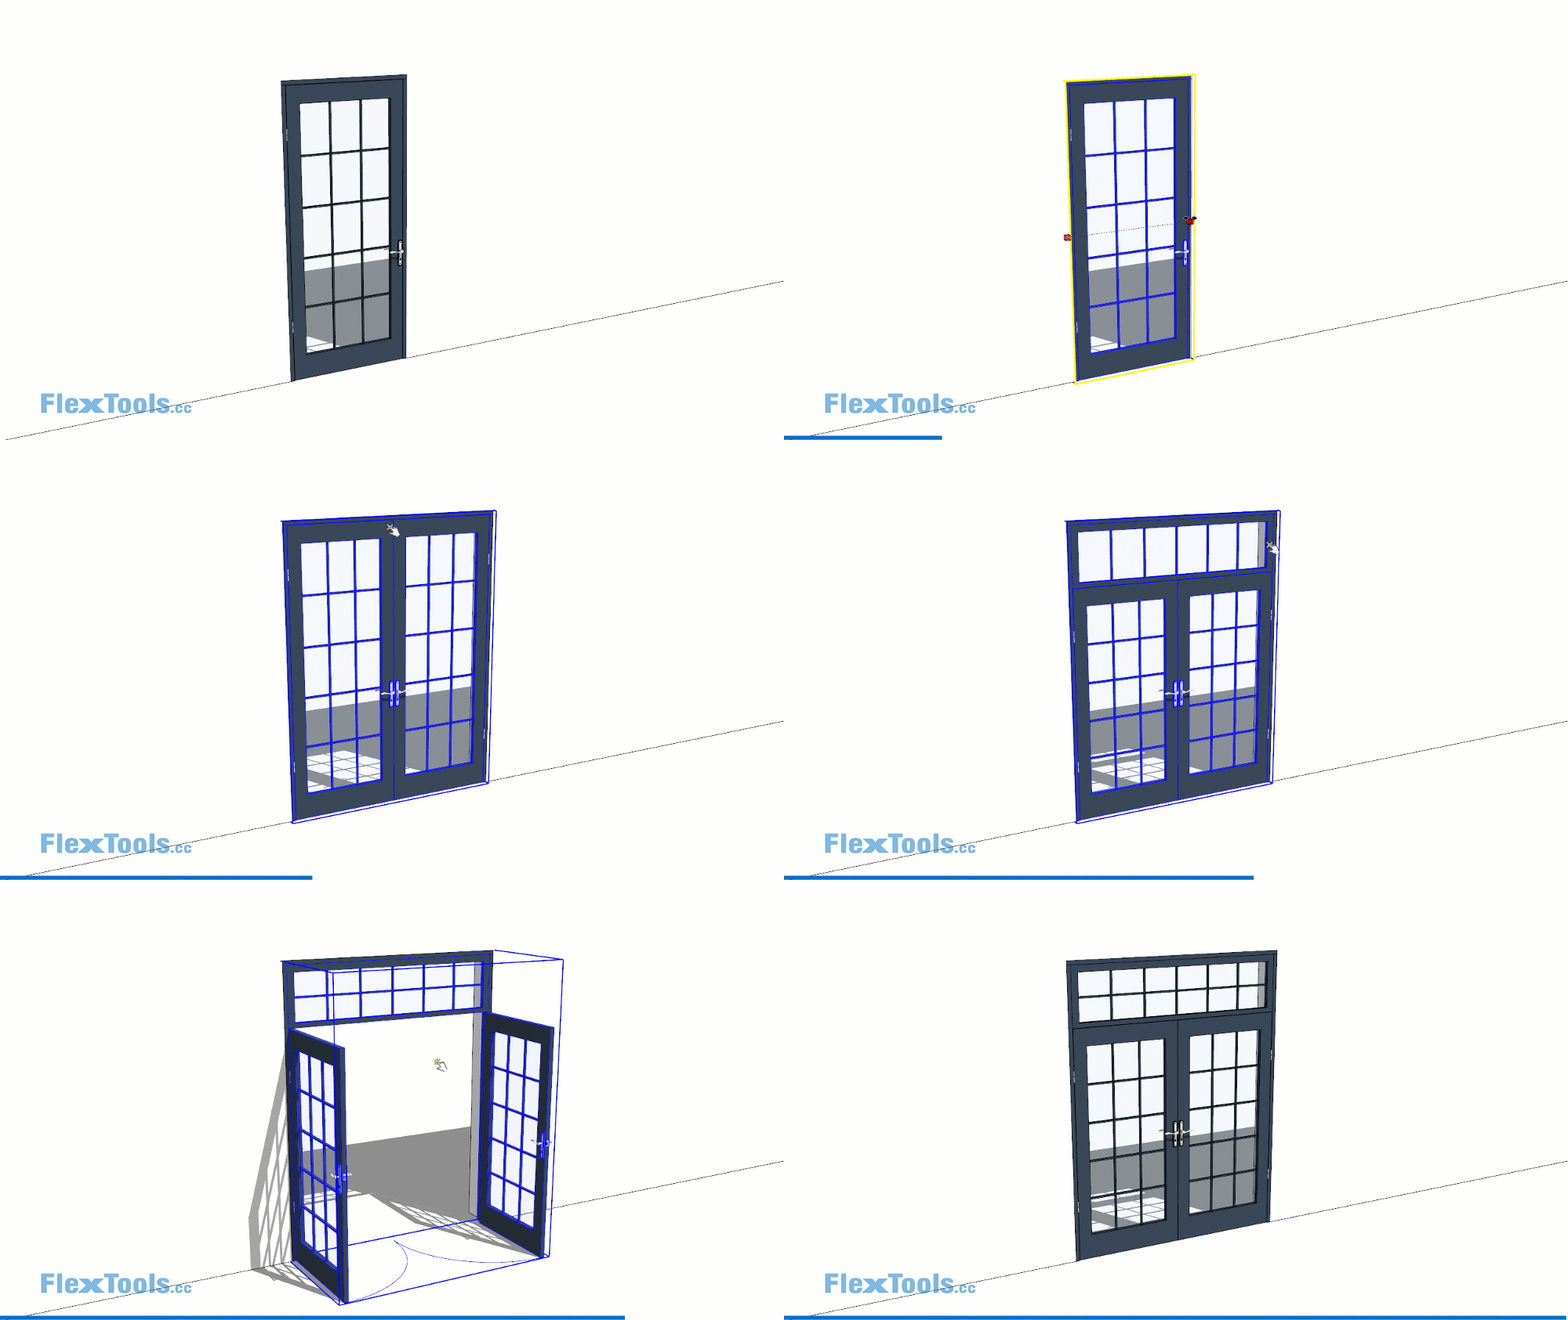
1 Panel / 2 Panels / 2 Unequal Panels
Click with the Interact Tool on the frame to toggle between 1 panel / 2 equal panels / 2 unequal panels.
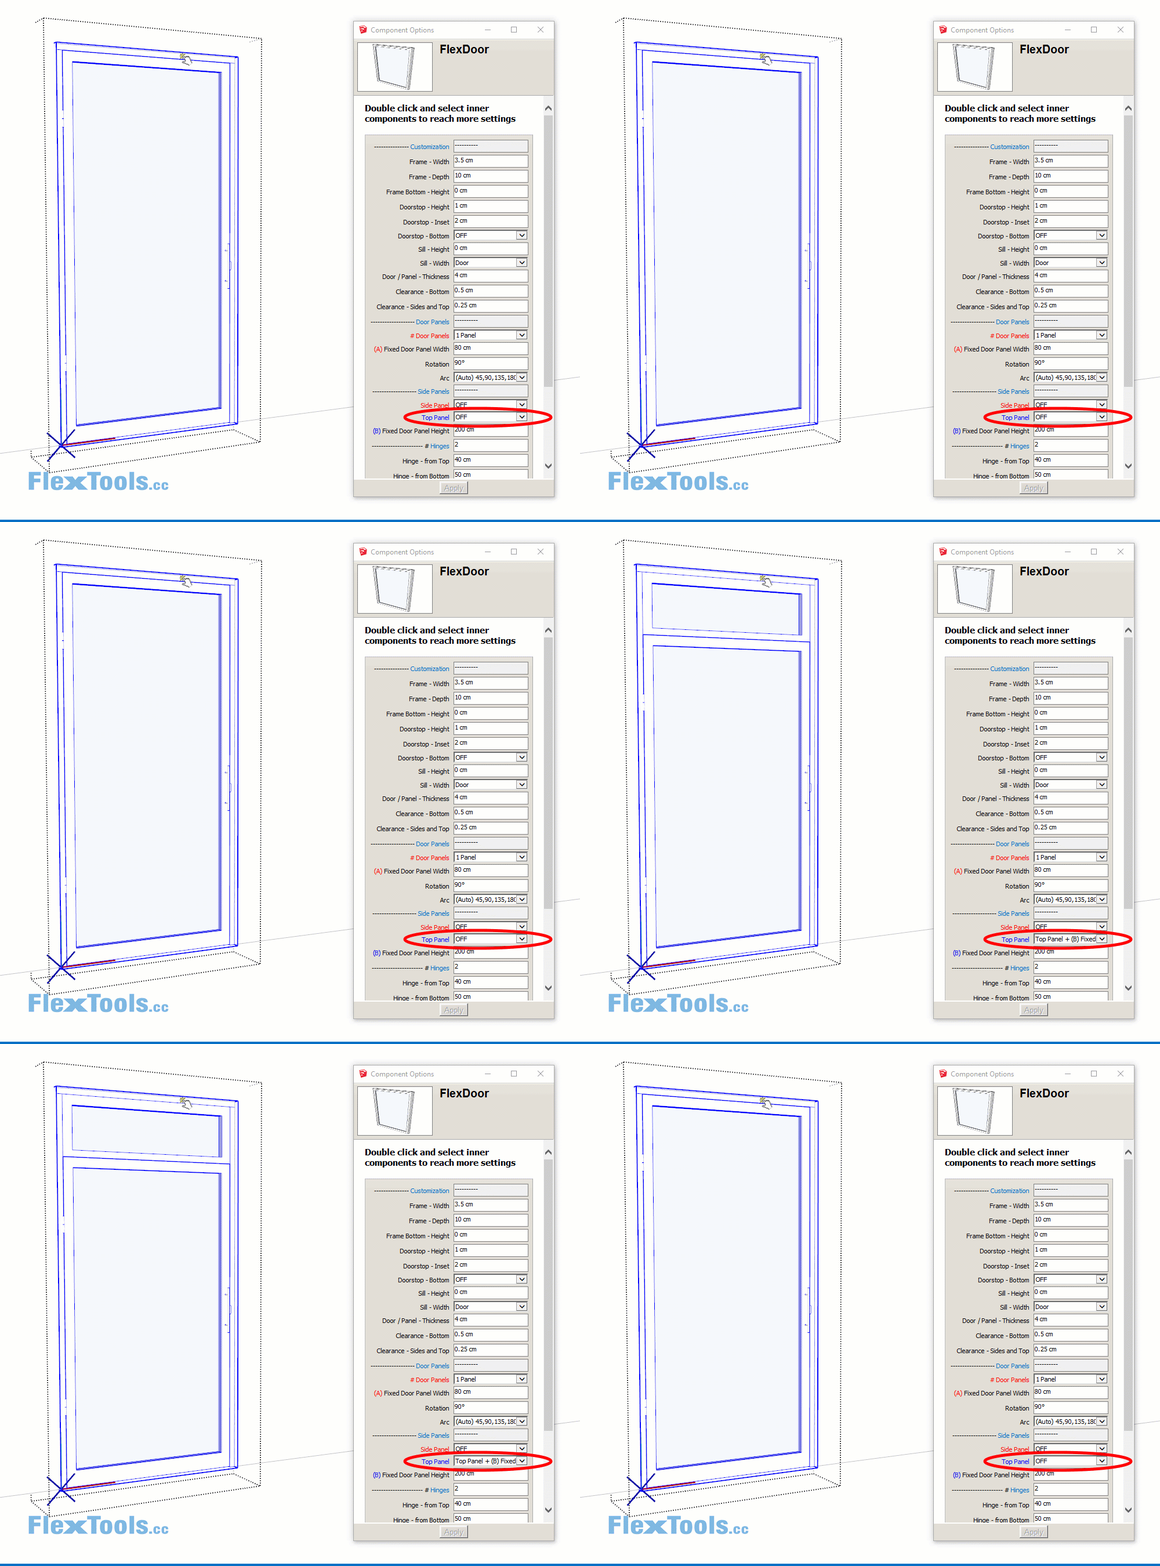
Top Panel
Click with the Interact Tool on the top of the frame to turn the top panel On/Off.
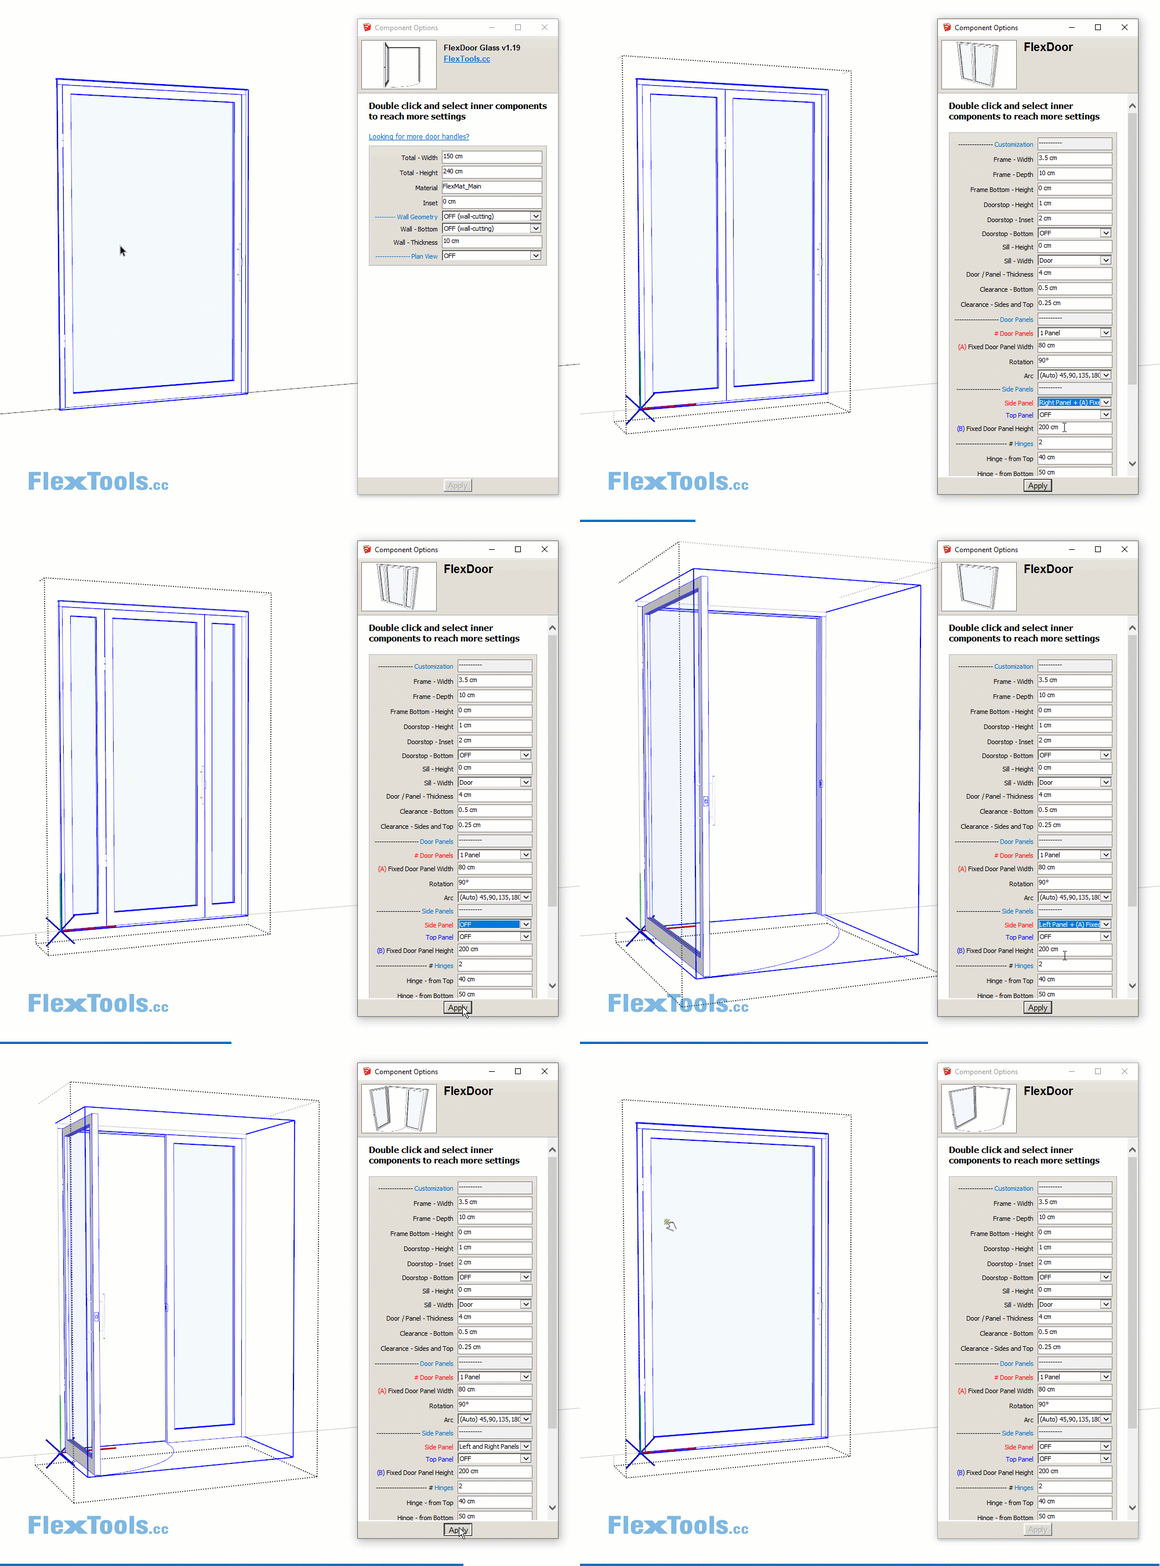
Side Panels
Double click and select the inner door component. Then choose between Left / Right / Left & Right fixed panels. In this case 'Fixed', means they will not swing open.
When you scale the door, the fixed panels will have a variable width, whereas the swinging door's size will be determined by the setting "(A) Fixed Door Panel Width".
Panel Configuration (FlexDoor Glass)
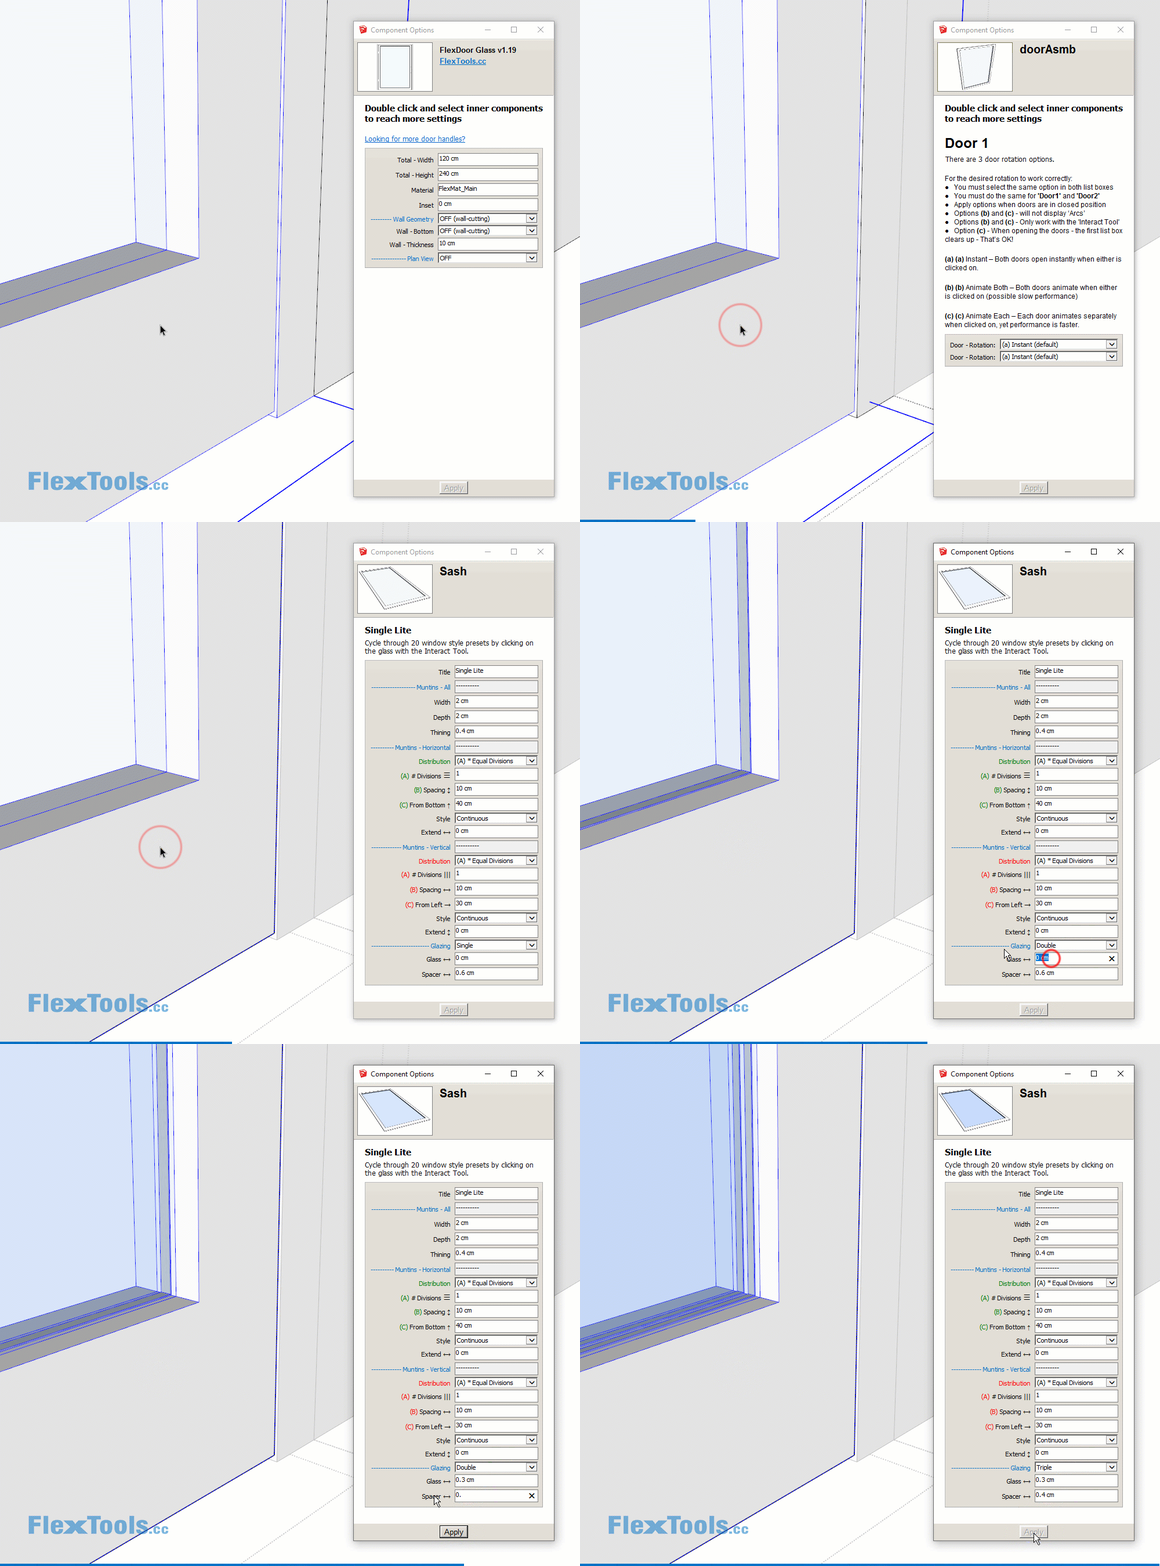
In order to modify each of the panels, have the Component Options window open and double-click on the flex door component until you reach the 'Sash' sub-component (4 double-clicks in). Select the sash to configure it's options.
Glass Divisions
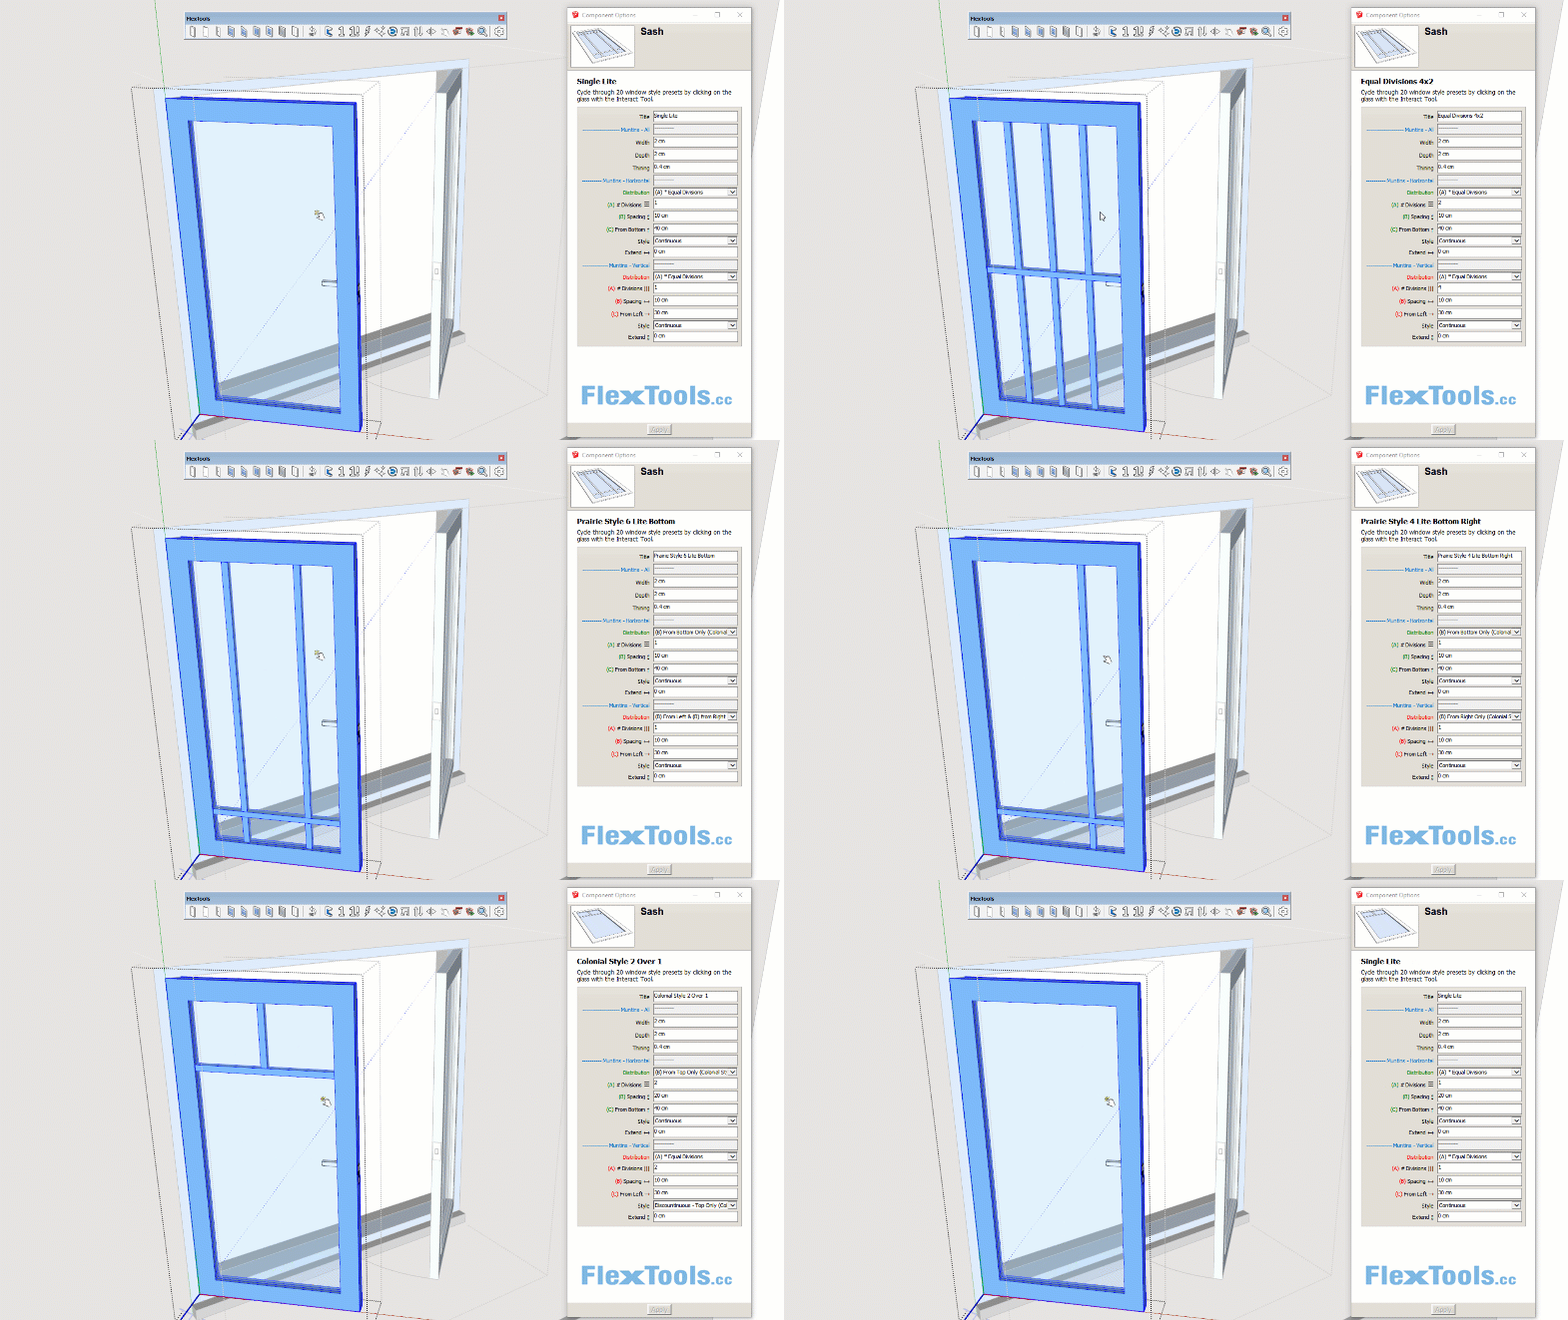
When in the 'Sash' sub-component, you can set the number of glass divisions (horizontal and vertical muntins), their dimensions, distribution type, and style.
Another way to set different distributions is by clicking on the glass with the Interact tool. It will quickly flip through 20 predefined glass distribution options. If you missed your distribution by accident, no worries, you can always go back with Undo (CTRL + Z).
More Panel Variations
More variations including wood paneled doors can be created by combining FlexDoor with pcmoor's dynamic Multi Panel component.
Double Glazing
For a better look and feel for interior views, you can adjust the glass thickness and add double/triple/quadruple glazing to each of the panels.
Note that the spacers between the glass panels protrude a bit instead of being placed below the line of sight. This is for reasons of keeping the component as lean as possible. If you want to reach a more realistic look where the spacers are sunken in, see Manual Adjustments.
Flipping / Mirroring
In / Out
On the FlexTools toolbar you will find the 'Flip Tool' which will change the door's swing direction from In to Out and vise versa.
📌 The flip tool can be used on multiple doors at once!
Left / Right
Right Click > Flip Along > Component's Red
📌 Highly recommended to assign a shortcut key for this.
PlanView
One click optimization for 2D plans - read more here.
Open / Close
To open or close a door click on the door panel with the Interact Tool.
📌 You can open and close multiple doors in one click with the Open/Close tool.
Fine Tuning
General Options
Almost everything can be adjusted and fine tuned... here are just some of the options:
- The dimensions both of the outer frame and that of the inner sash (FlexDoor Glass) can be adjusted.
- You can set the 'Inset' position of the frame in relation to the wall.
- Change the doorstop dimensions or set it to 0 so it disappears.
- Set the sill dimensions and click with Interact tool to extend it to the sides.
- Set the clearance between panels and the frame that's around them for a more realistic look.
- Set the number of hinges
- Change the handles' position & visibility.
- Change handles or make your own.
Pivot Door
A pivot door can be created easily by moving the rotation axis.
Manual Adjustments
You can add extra detail by manually editing the geometry that is inside each of the sub-components.
To make sure the edits will maintain their proportions correctly when scaling the door component:
- Set the dimensions of the sub-components you're going to edit in the Options Window before making the changes. (Let's say, set the frame width to 10 cm)
- Make sure that the boundaries of the sub-components that you are editing are NOT changed (i.e. they remain within the width of 10 cm).
Example1: Beveling
For quick beveling try Fredo's Round Corner plugin. As long as the dimensions of the frame are not changed, the bevels will maintain their proportions after scaling the component.
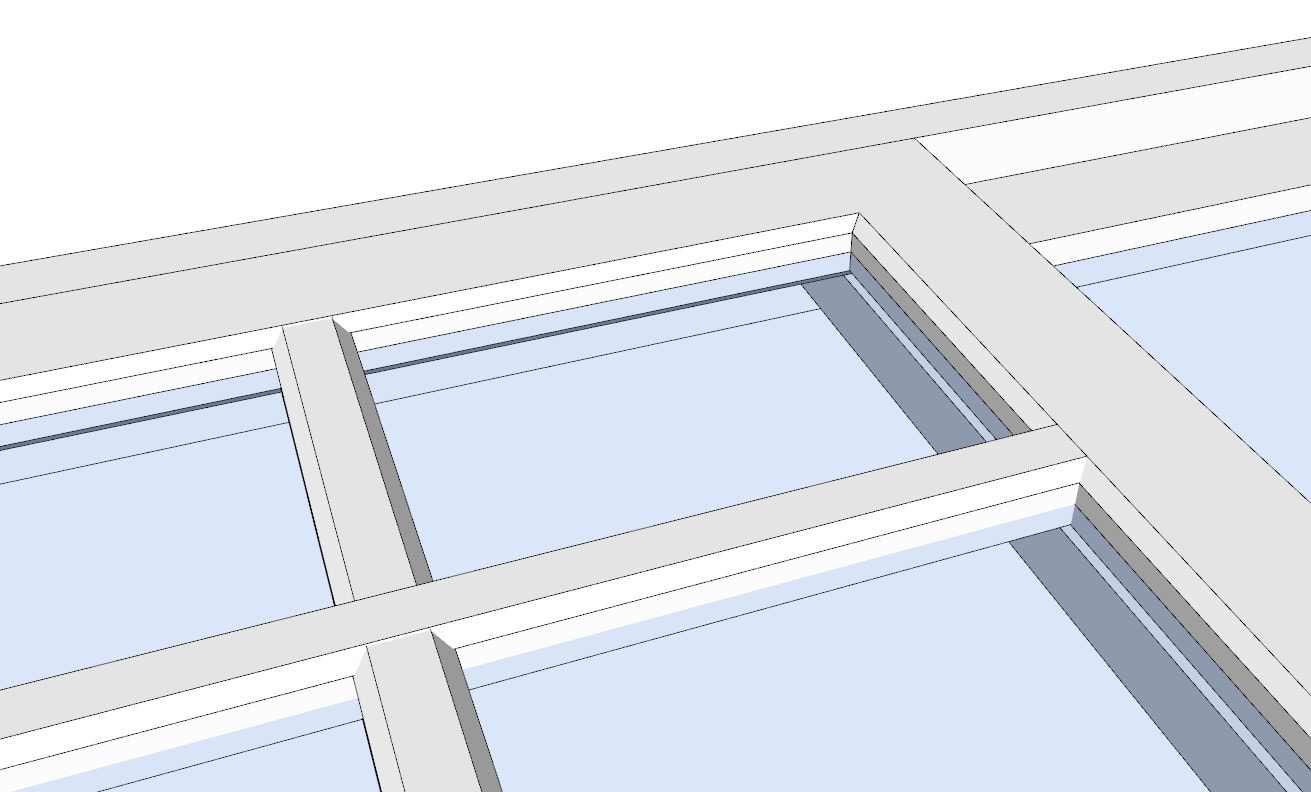
See a great example of how one can customize a flex window for a more realistic look by beveling the frame edges, adding weep hole covers and modifying the sill.
Example2: More Realistic Double Glazing
You can choose to 'Extend' the glazing into the sash's frame and then manually edit the frame components by drawing a rectangle as wide as the double-glazing, 'push/pull' to reveal the edges of the glass and spacers and push/pull all the way up and down.
You will need to repeat this process for all the frame parts including the corners.
Click to enlarge
Handles (Locksets)
Changing Handles
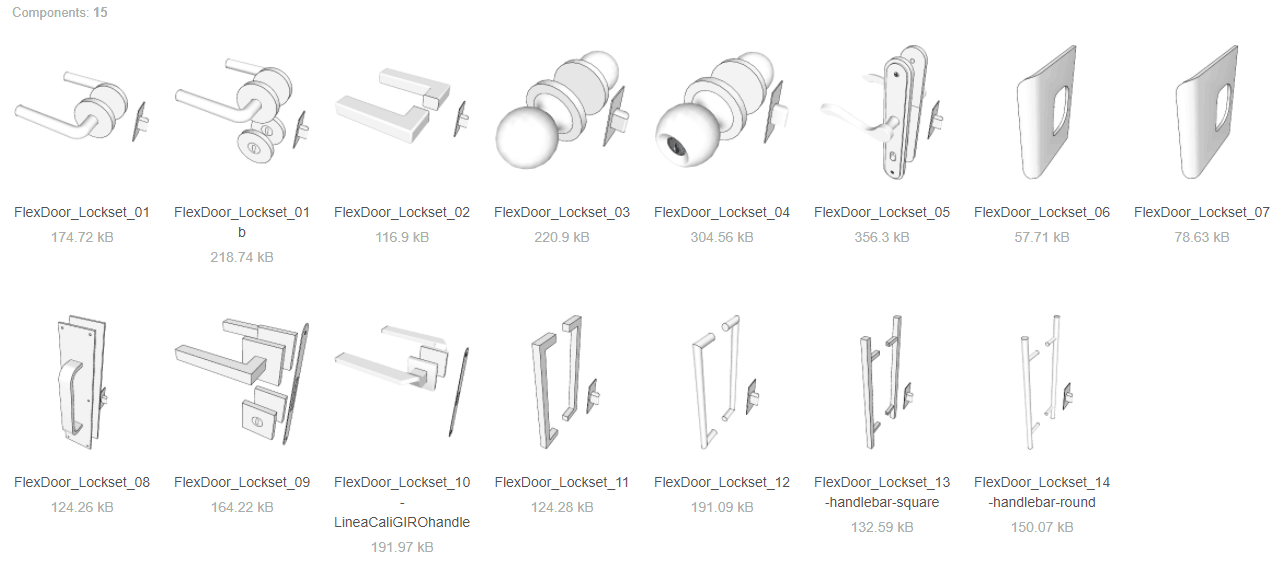
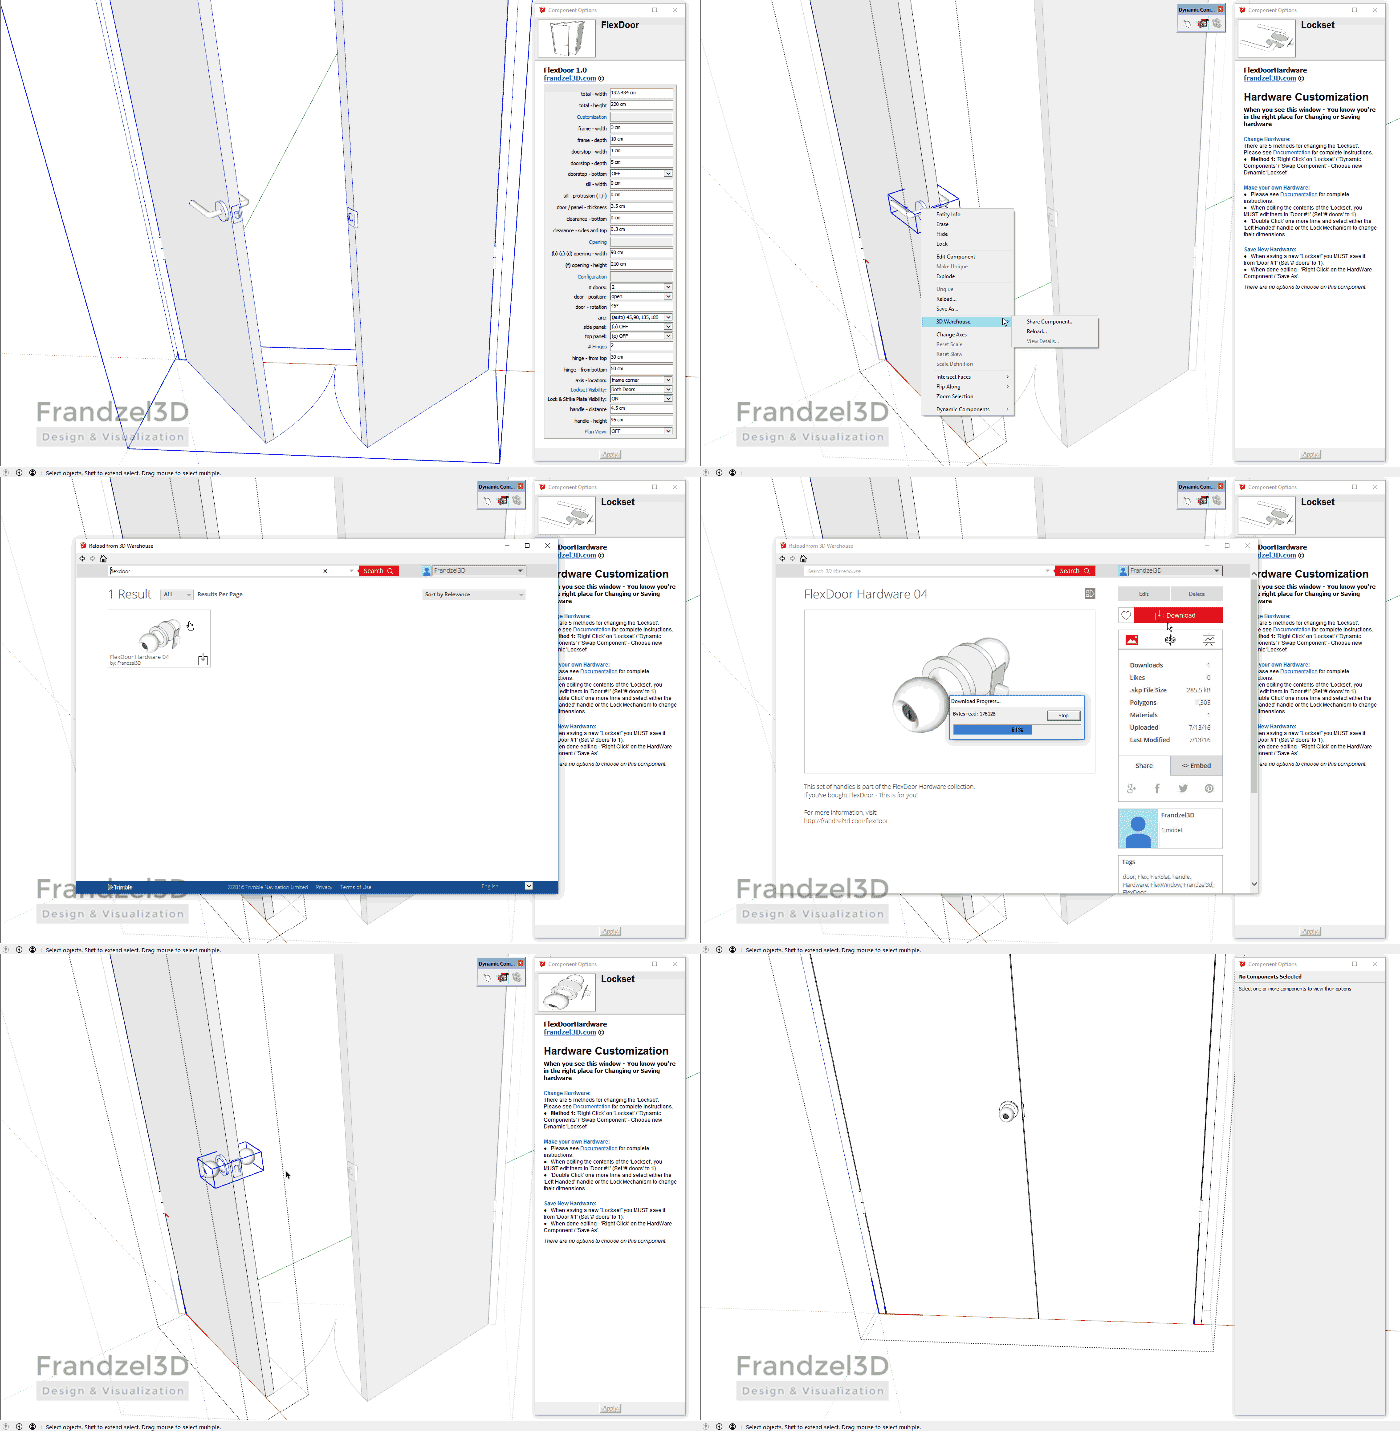
You can change the door handles (lockset), by replacing it with one from our free collection of dynamic locksets hosted in the 3D Warehouse.
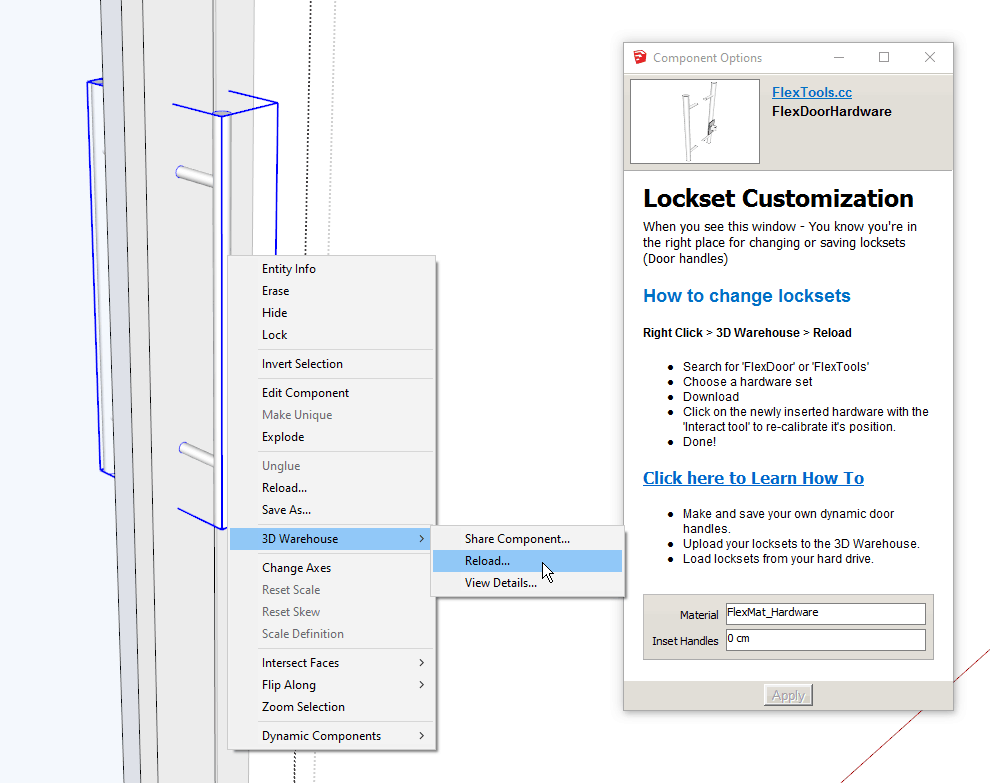
You can do this directly inside the door component:
- Double click into the component multiple times until you reach the 'Lockset Customization' window.
- Right Click > 3D Warehouse > Reload
- Search for 'FlexDoor'. Choose and download the new lockset into the model.
- Click on the lockset with the Interact Tool to correct its location.
Make Your Own Handles
You can make your own custom lockset combinations and handles - Read more here.
Materials
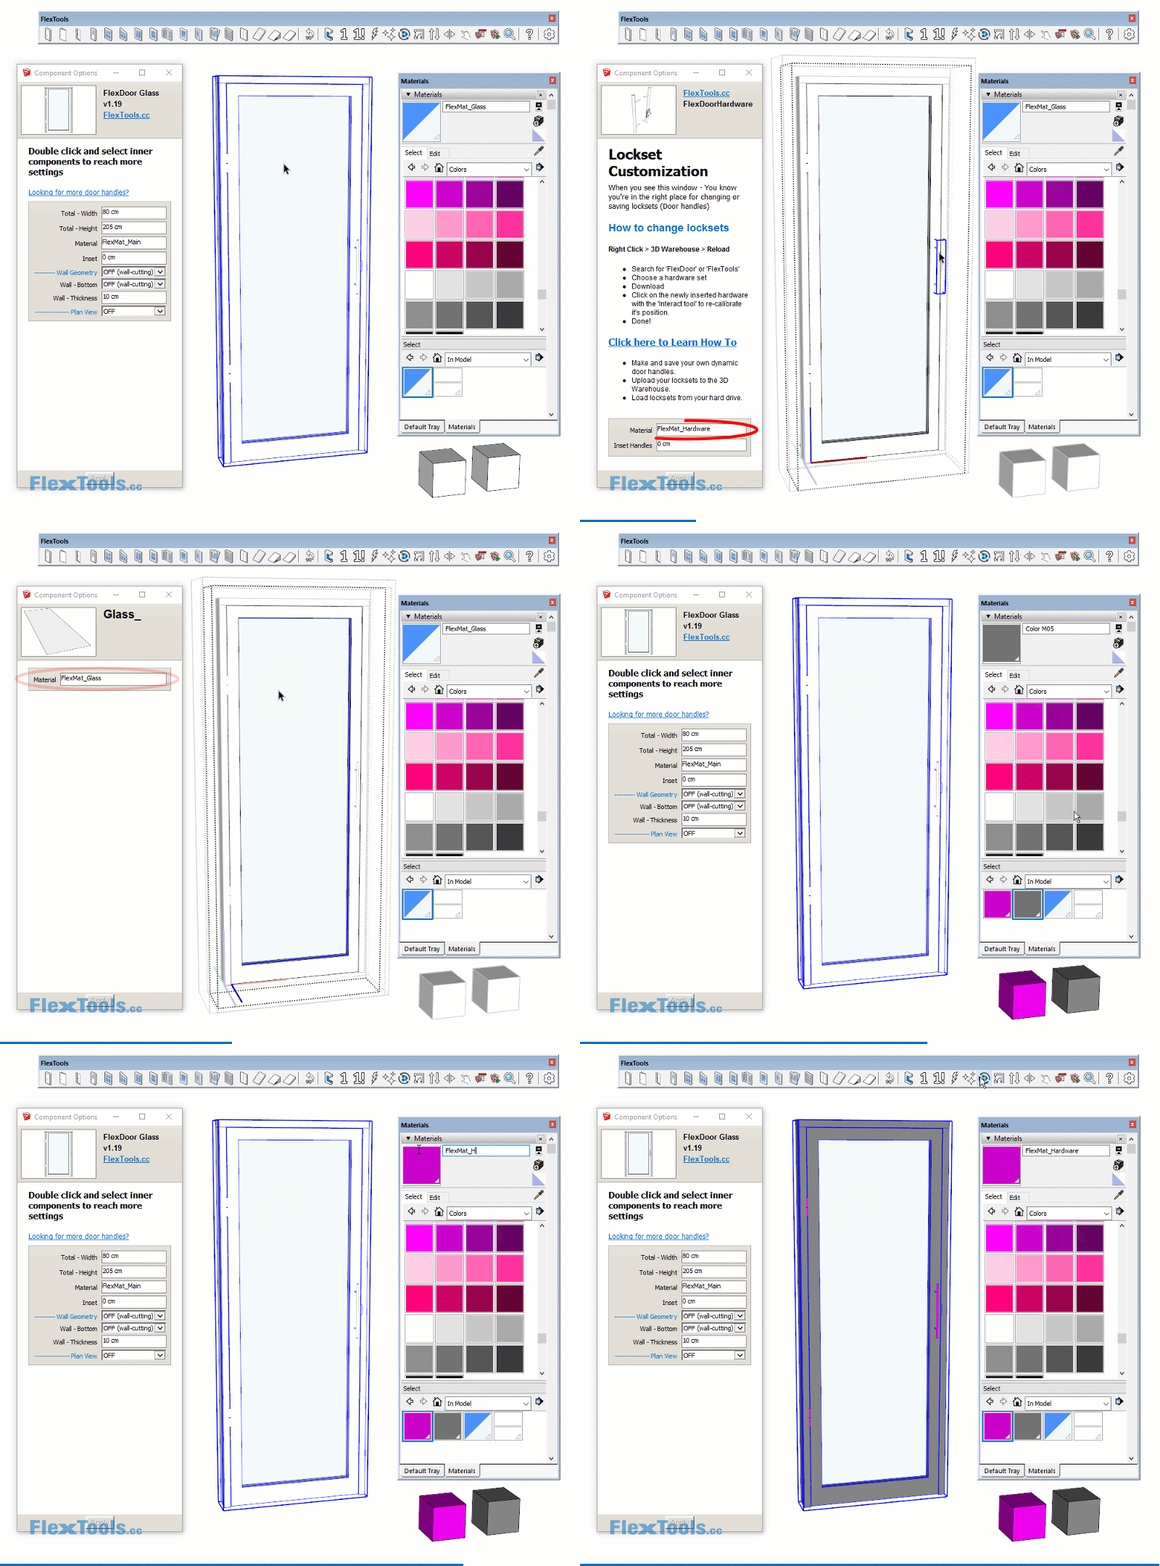
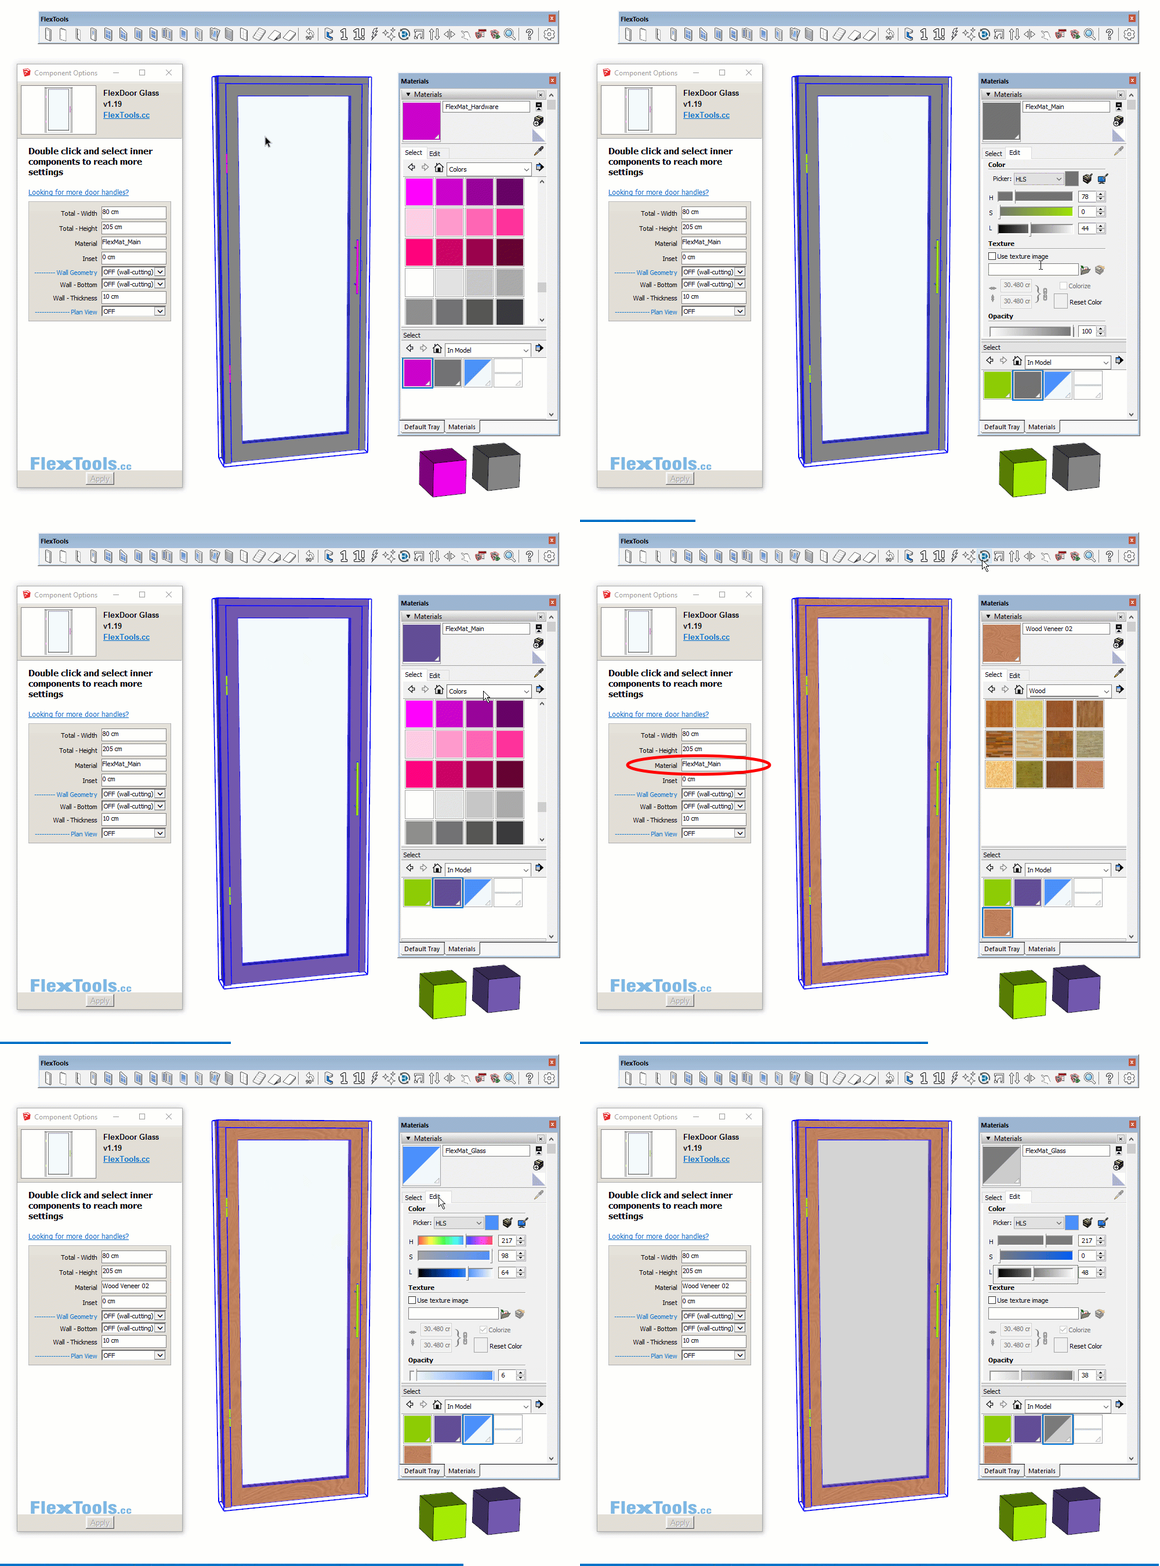
You can use the Paint Bucket to apply any materials you want onto the main component or onto its sub-components.


Included Materials
The only materials included with flex components are:
- FlexMat_Glass
- FlexMat_Spacer
You can replace or edit or delete the above materials just like you would with any component.
Pre-defined Material Attributes
In addition a few default material attributes are pre-defined for the main root component and for some of the inner sub-components:
Outer Component
- FlexMat_Main
Sub-Components
- FlexMat_Glass
- FlexMat_Spacer
- FlexMat_Hardware
- FlexMat_Sill
- FlexMat_Wall (Used for mass modeling when the wall geometry setting is set to ON)
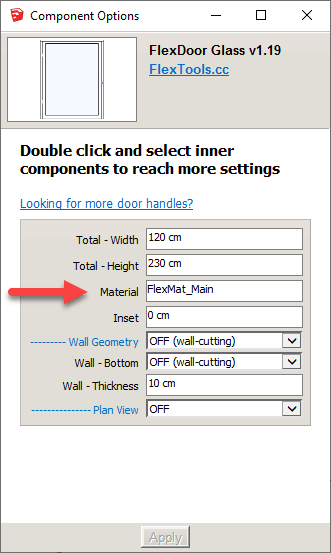
Change Material
There are two ways to change a material.
1. You can change any of the default names by entering a new name. If a material by that name exists in the model, refresh the component, and it will then be painted with the material.
2. Apply a material with the paint bucket tool on the outside of the component > the material will change as usual, and so will the material name in the options window.
Remove Material
There are two ways to remove a material.
1. Apply a default material with the paint bucket tool on the outside of the component. If after a refresh the previous material comes back - see point 2.
2. If you want to cancel a set material enter a space ' ' and hit on apply, or enter a name of a material that doesn't exist in the model, like '0'.
🐞 Unfortunately there is Sketchup DC bug - When a material that is set in the options exists in the model, applying the 'default material' with the paint bucket tool will not always work after refreshing the component (the previous material might come back). So either make sure that material doesn't exist in the model (purge) or manually rename with a space / rename to non-existent material.
So what are these predefined attributes good for?
Example 1: Painting materials retroactively quickly.
You've placed a lot of components in a model and you haven't assigned materials to them ahead of time. You then decide you want all the sills painted orange. Since some of the components are unique by now, you would need to double click into each and every component to apply the orange material onto the sill... that can take a very long time.
Instead, create a new Sketchup material called FlexMat_Sill and adjust its color to orange. Then refresh all the Flex components (Select All > Refresh > Wait... (Yes, DCs can be slow) ) and see the magic - all the components will be painted orange.
Once the material is set, you can change its name to any name you want through Sketchup's materials window.
Example 2: Scheduling.
Though Flex components are not currently optimized for scheduling, you can use the Material attribute when generating a report. To list for example all the wooden doors and aluminum windows you have in a model you would change the FlexMat_Main material for the doors to Wood and for the windows to Aluminum either by changing the material name attribute or by applying these materials with the paint bucket.
Contents

